Importing tasks from CSV
Modified 1 year ago
Abhiram
The CSV Import tool will assist you in transferring work items from a CSV file or a spreadsheet with .csv extension to Kissflow Project, allowing you to get started on any project right away. This method can also be used to import data from other project management tools.
Once imported, your CSV rows will appear as tasks in a project, and each column will contain metadata about your tasks.
Prerequisites: How to organize the data in your CSV file
The CSV Import feature allows you to import data in bulk into Kissflow Project. Here are some guidelines to follow when preparing a CSV file for import:
- Title: The CSV file must have a column named Title for the names of the tasks in your project.
- Other columns: Additional columns are optional, and can be mapped to other fields of the task. Within the CSV file, only Text, TextArea, Number, Rating, and Date type field values must be entered. This is due to the fact that only these types of fields can be mapped to your project.
- Delimiter: Only the comma (,) is permitted as a delimiter inside the CSV file.
- Rows: The CSV file can only have up to 500 rows, excluding the header.
- Encoding: The CSV file must have a .csv extension that supports UTF-8 encoding.
How to import a CSV to Kissflow Project
- Sign into your Kissflow Project account. Create a new project, if you haven't created one already.
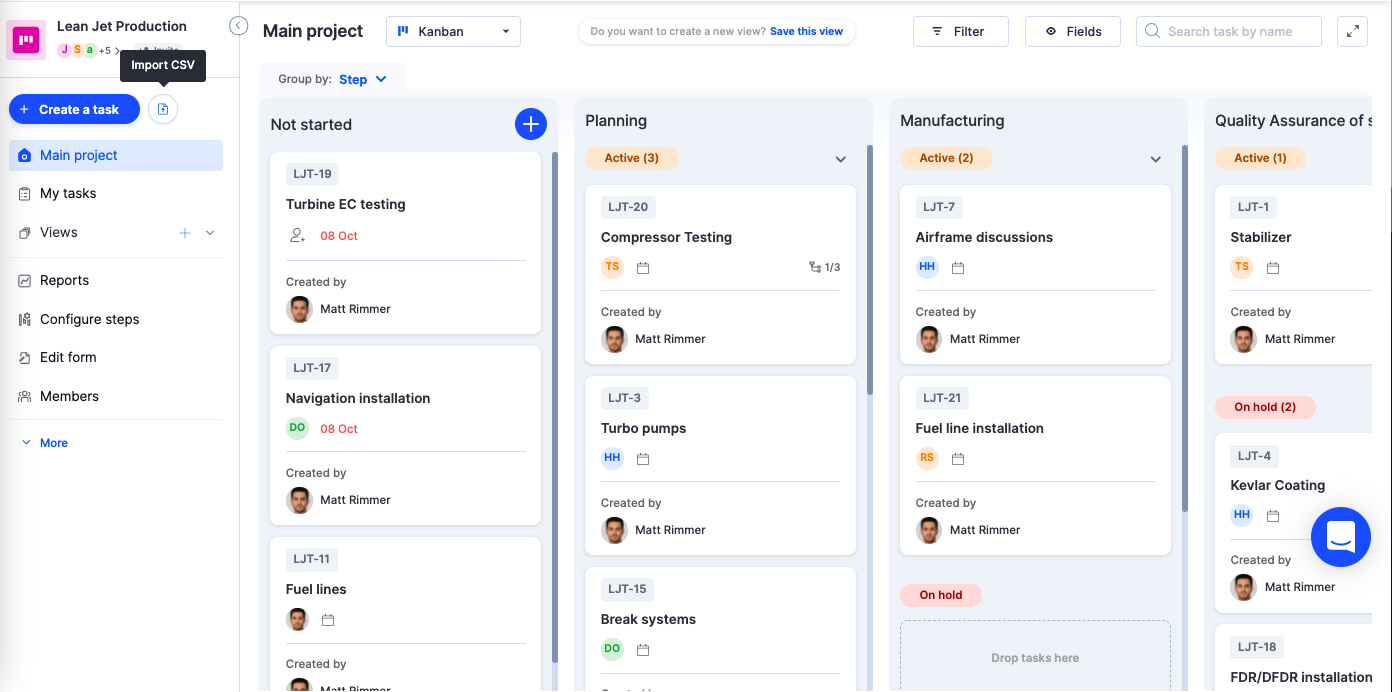
- In any of the project visualizations, click the Import CSV button (
 ) beside the + Create a task button.
 - After the file picker opens up, click Choose your files and browse your documents and select your desired file having a .csv extension.
- After the CSV file is imported, it's checked for file corruption and delimiter errors. If you are notified of an error, please correct the error in the CSV file before re-uploading it.
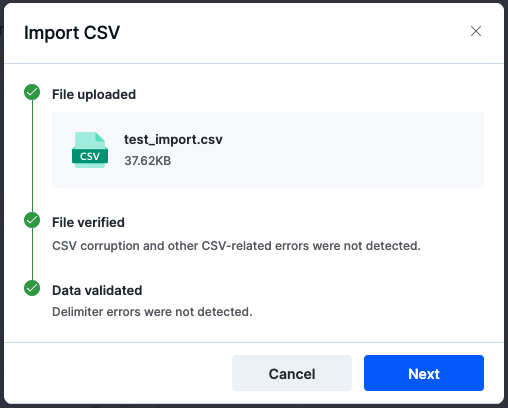
- Click Next to continue. Then choose the column(s) from your CSV file that you would like to appear as the task details on your project.
You will be asked to map the columns in your CSV file to the columns on your project. For example, you can choose to map the email addresses from your CSV document into the Email Column on your project.At least one column in your CSV file must be mapped to the Title field of your project.The CSV header names and project fields must be of the same data type.

Managing duplicate tasks
Following the mapping of your tasks, you will be asked how you wish to handle duplicate tasks in your project. You'll have three choices:
- Select Create a new copy of the task to add the data to the project as new tasks. It will keep the original tasks on the project.
- If you select Skip the task, this option will skip any duplicated data based on a column you've chosen. Choose a column with unique values in your data (e.g., email, phone number, address) to assist us in determining whether this task already exists in your project. The remaining data will be added to a new group on your project visualization.
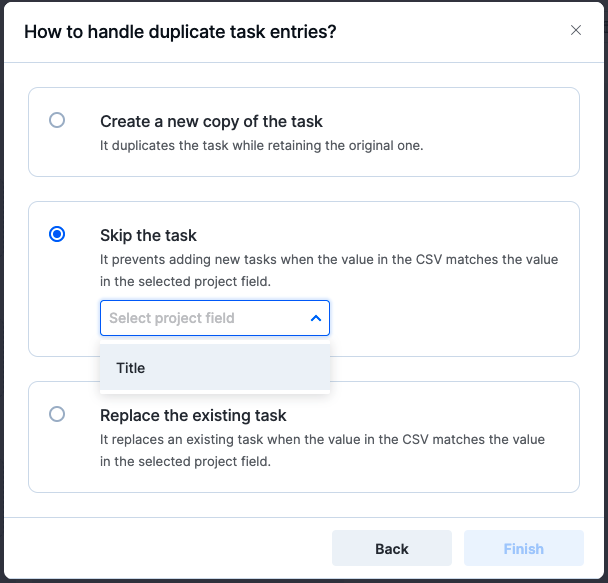
- If you select Replace the existing task, you will be able to overwrite existing tasks based on the data in a specific column of your CSV file. Choose a column in your data with unique values (i.e. email, phone number, address) to assist us in determining whether this task already exists in your project. The new data will be added to your project visualization's Not started step.
Click Finish. Your tasks will begin importing. You can close the window and continue working while you wait for all of your tasks to import to your project. After the import is complete, you will be notified via email and push notifications.
Previewing your project
After successfully importing the tasks into your project, you can find them in the Not started step, with each task containing the data mapped from the CSV file.