
 User guide
Account security

Super Admins and IAM Admins have complete control over the sign-in page customization and custom sign-up URL associated with your organization’s domain.
Manage how users sign in
Your account is assigned a unique URL that can be used for signing in. Users can enter the email address and password they set up on the sign-in page during the initial sign-up or after a password reset.
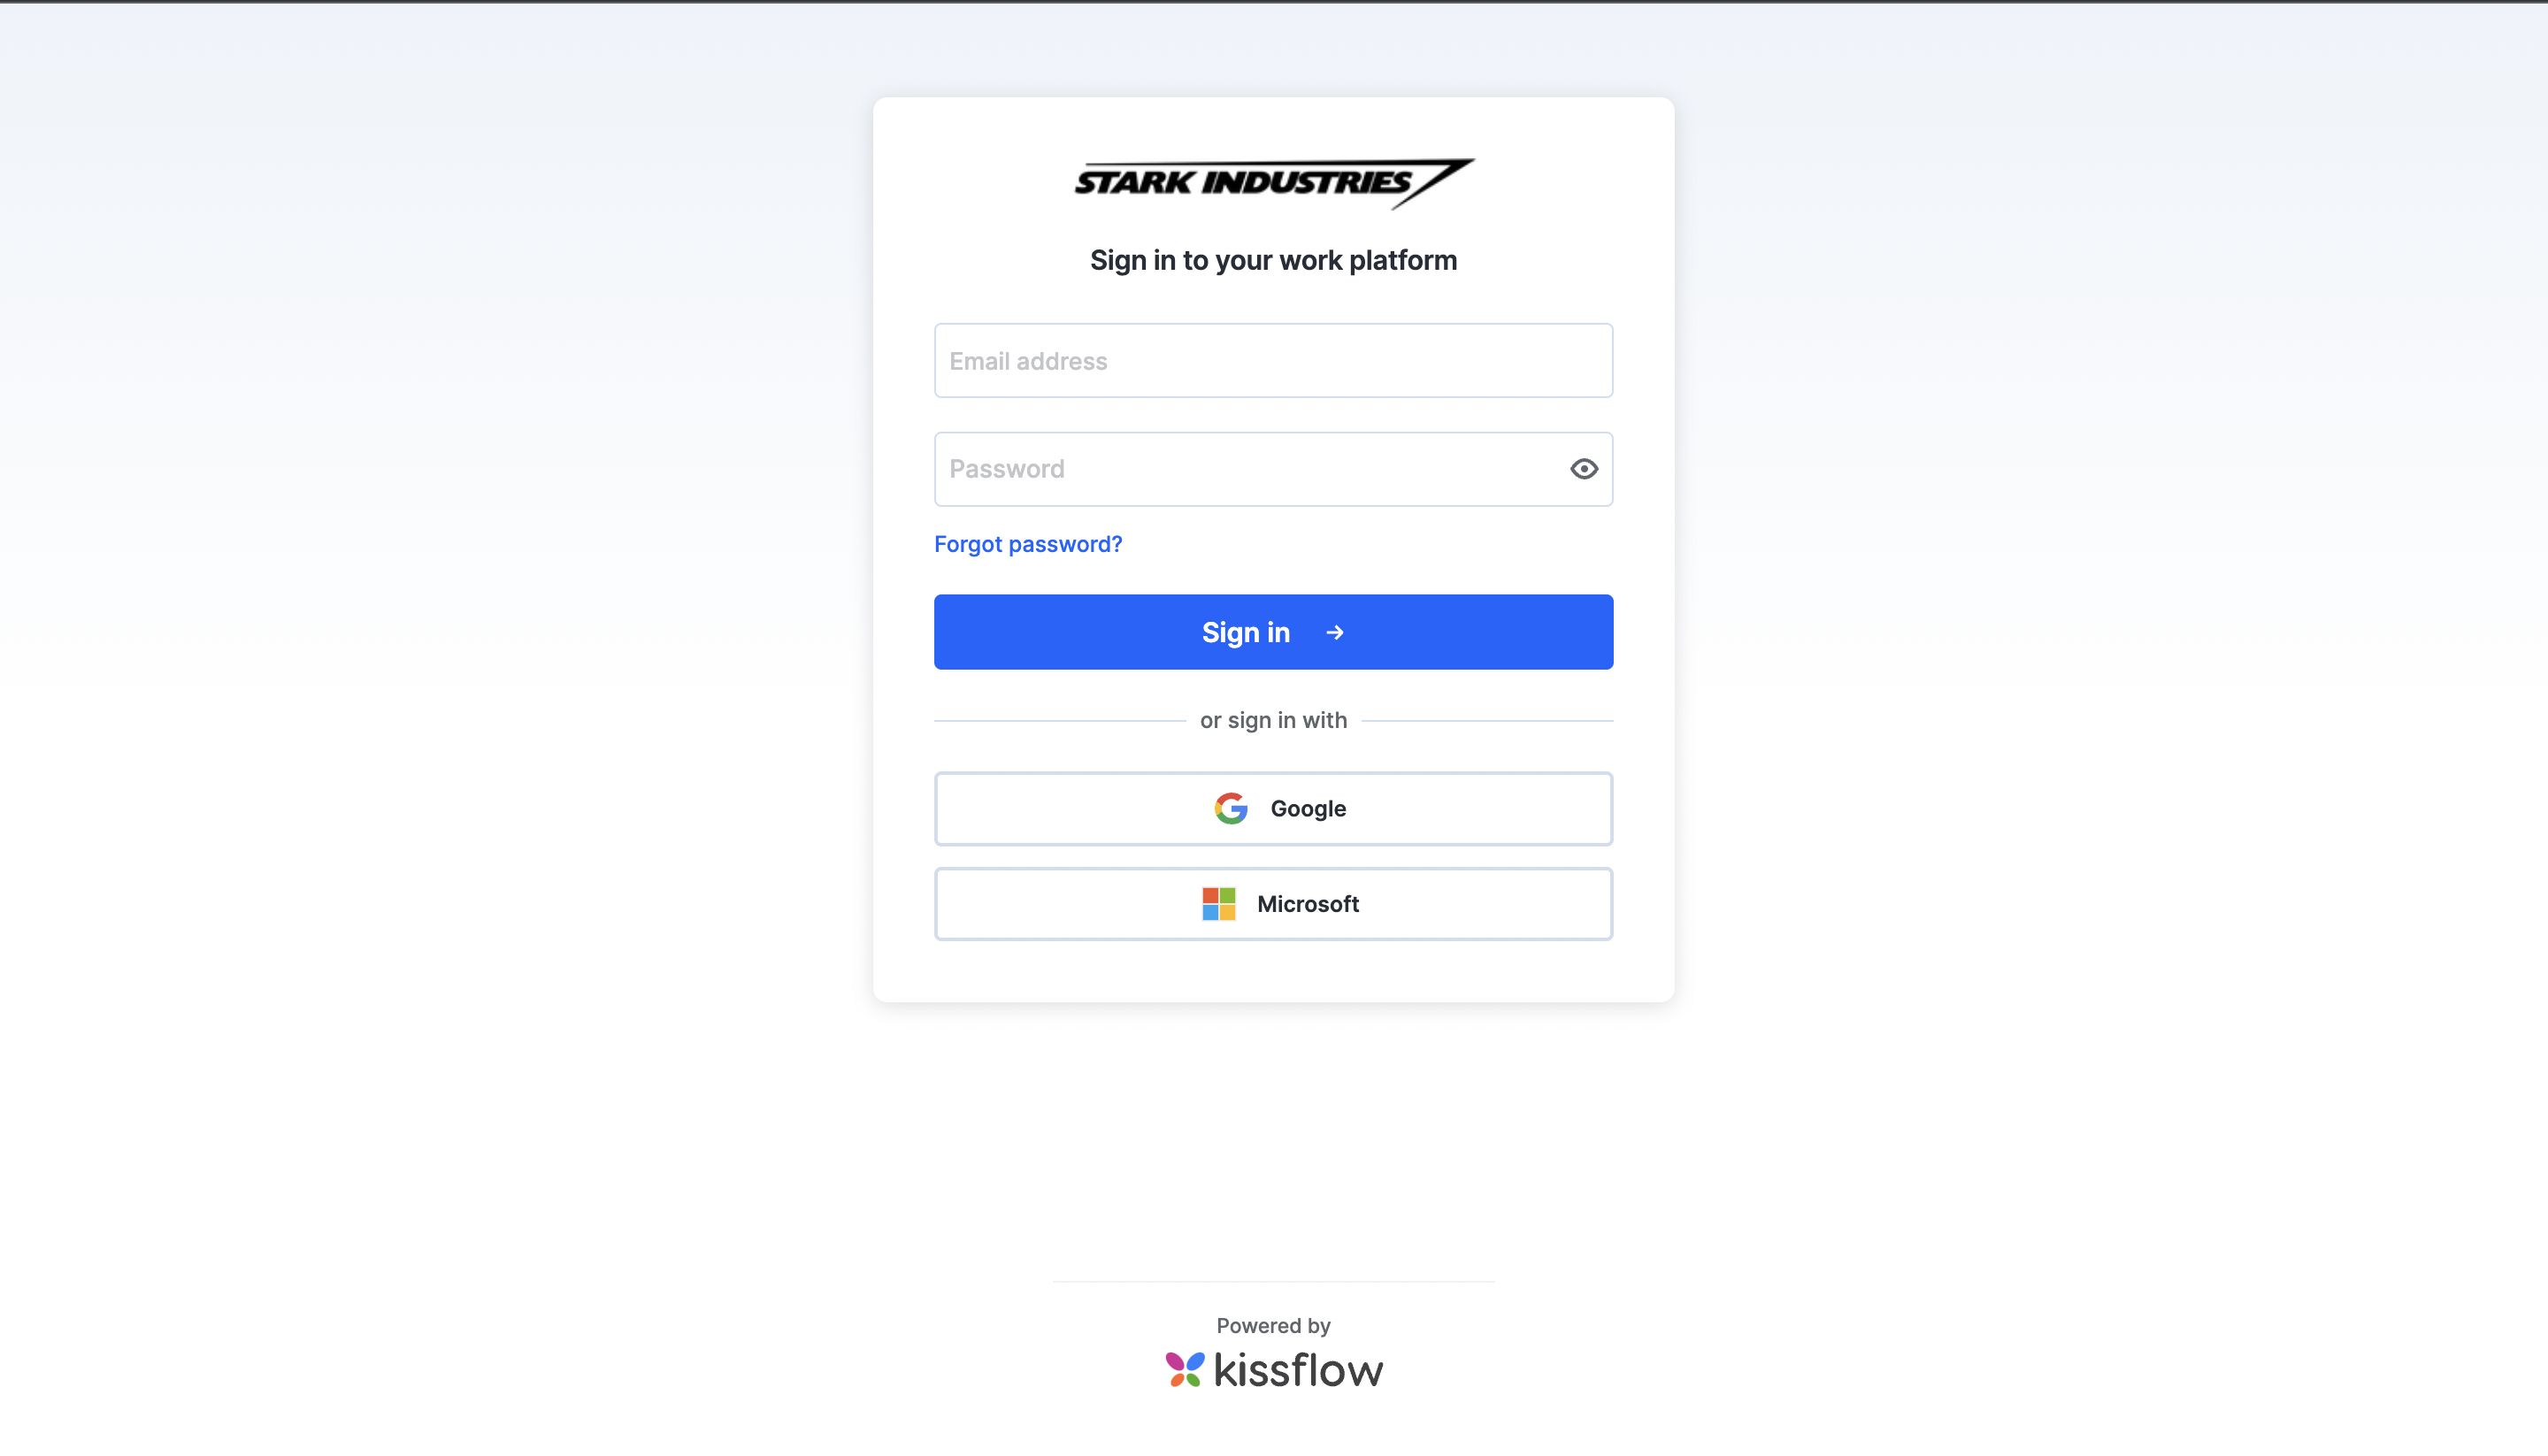
Kissflow also supports OAuth-based sign-in for Google and Microsoft accounts. There is also a custom Single sign-on (SSO) option for organizations using a SAML-based sign-in (this will be useful for you if you are using Okta, OneLogin, etc.) From Account security > Sign-in preferences, you can restrict the options for signing in.
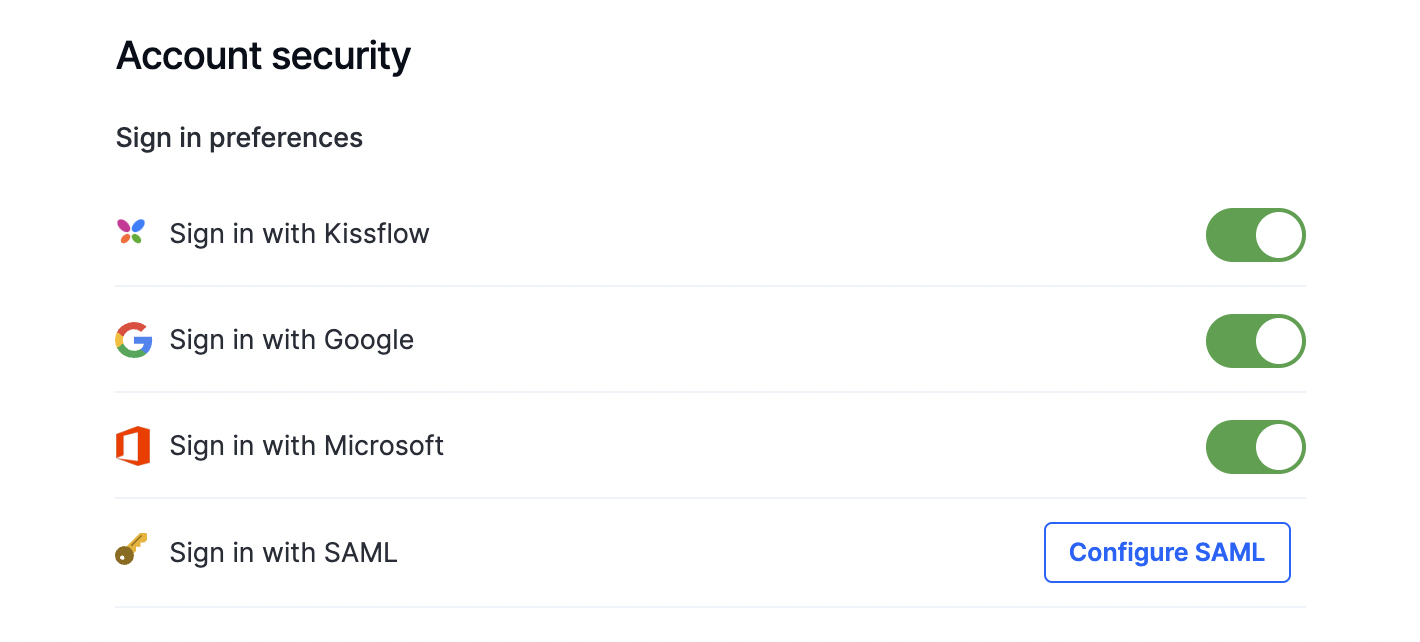
To enable a SAML-based SSO sign-in for your customers, enter the following details after clicking the Configure SAML button:
- Identity provider (IdP) URL - This URL comes from the SAML provider you've chosen. Once a user clicks on the SSO button from the sign-in page, they will be directed to this remote sign-in URL of your SAML server.
- Sign out URL - This is an optional field. You can provide the sign-out URL to direct your users to a particular URL after signing out of the SAML provider and Kissflow platform.
- Security key - Kissflow uses the SHA2 fingerprint of the SAML signed token certificate from your SAML server to decrypt the data from your SAML provider.
- Consumer assertion URL to Kissflow - This is the URL you must provide to the SAML provider. This URL is unique to your account.
- User field where SAML identifier is stored - Specify the column name in the user management table where you want the unique SAML identifier stored.
- Create users when they exist in the IdP - Enable to automatically add your company's users after they verify their user identity.
After entering all the information, click Save to enable SSO using SAML.
Note:
Click here to learn how to set up a SAML-based SSO for Microsoft Azure AD.
Manage how users sign up
Rather than individually inviting new users, you can make your Kissflow sign-up process globally accessible by sharing the custom URL. You can access Sign-up preferences and enable the Allow new signups option.
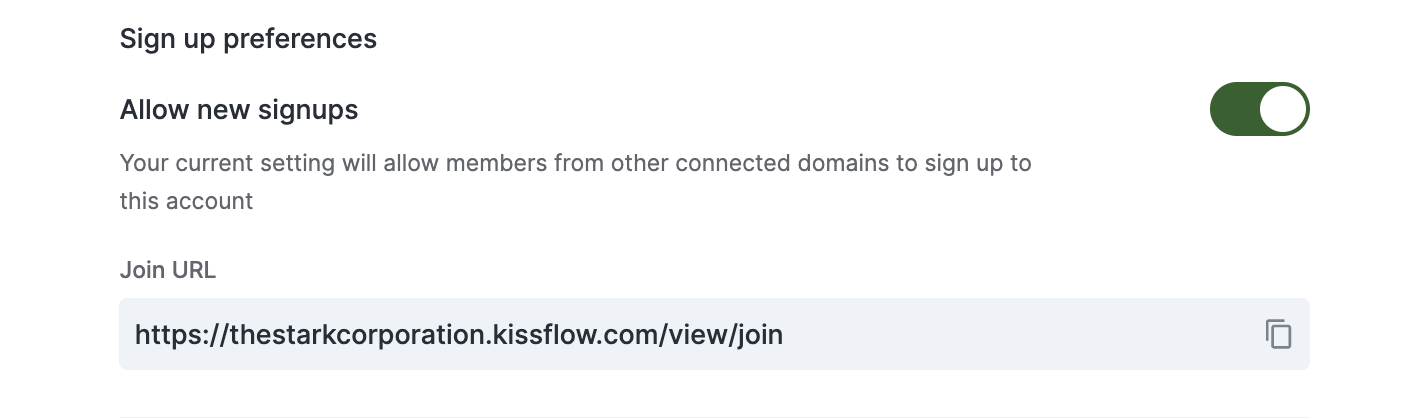
Anyone who visits this URL will be prompted to add their name and email address. Then, as a Super Admin, or an IAM Admin you will be notified to approve the user's sign-up. You can manually choose the user from the User Management tab and click the Activate button to provide an active license to the user.
If you want to disable future sign-ups via this URL for new users, disable Allow new signups and click Save.
Access key setting
You can limit the maximum expiry duration of the access keys created via the Kissflow account you are currently administering with the help of this setting.
Navigate to Account administration > Account security > Access key setting to set the expiry limit.
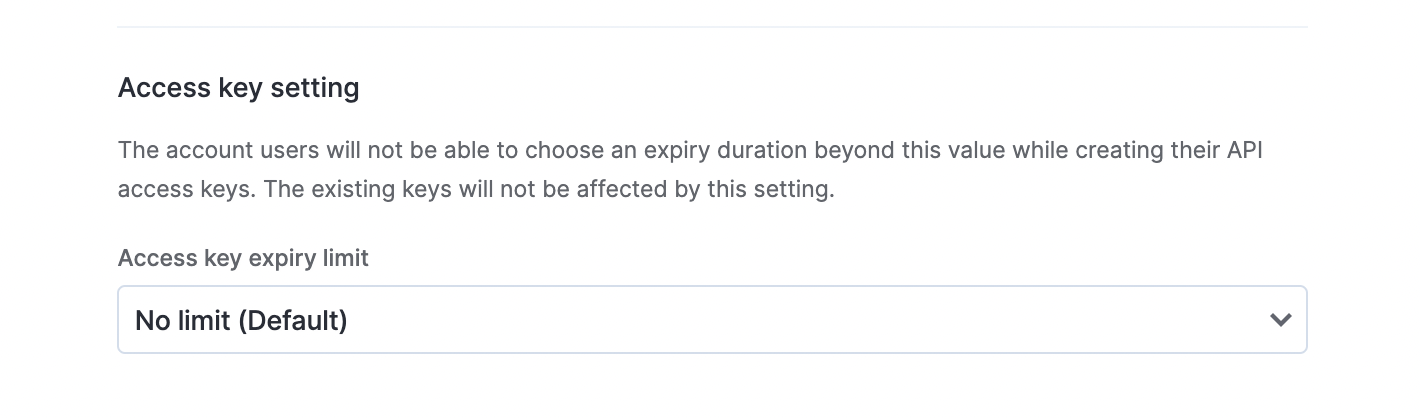
The expiry duration periods we currently offer are 6 months, 1 year, and 2 years. You can also opt to have no limit for the expiry, the default value set for this dropdown.
Note:
This is an account-level setting, and any changes made here will affect all the existing and new access keys.