
 User guide
Generating document templates

You can use a document template to automate the generation of your process-related PDFs. You must be a Process Admin or a Process Developer to create these templates.
Note:
For example, if you are an HR manager in your organization and you manage the ‘Recruitment’ process in your organization’s Kissflow account, you will be able to create a document template that can help you generate offer letters automatically when the candidate progresses through the interview process and gets the offer.
Creating a document template
- Navigate to the process for which you would like to create a document template.
- Click the More options button (
 ) and click Document templates.
 - Click + New template.
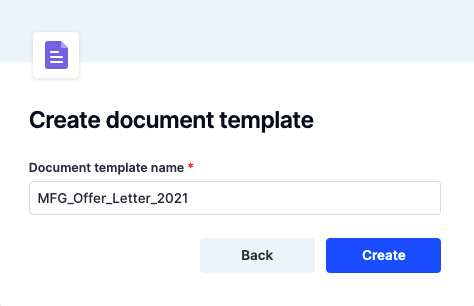
- Enter the name of the document template.
- Click Create.
Editing a document template
You can draft the content of your template in the editor that opens up after you create it. This editor supports all the formatting options like any other text editor and offers additional support to insert process fields, page breaks, images, and form tables too.

As we have built this feature using the Jinja templating engine, we recommend you explore its potential to the fullest by referring to its documentation here. You can write advanced conditions or loops, and extend the functionality of the template if you are familiar with Jinja.
Inserting process fields
You can insert a specific system or process field in two ways:
Enter two curly braces without any space in between them like this “{{“ to see the list of fields used in the current process and select the field that you want to insert in the document template.
(or)
You can also drag and drop the specific field from the left panel onto the template editor.
We support only the following field types in the document template:
- Text
- Text area
- Number
- Currency
- Sequence number
- Date
- DateTime
- Child tables/Form tables
Inserting page breaks
You can add as many pages as you want in your document. Click the Page break button (![]() ) from the toolbar to insert a page break.
) from the toolbar to insert a page break.

Adding a form table
You can insert the form tables created as part of your process into your document template.
Drag and drop a form table in your process like how you would add a field onto the template editor. Please note that a line of code would be appended above and below your form table when you drag and drop it. These syntaxes are added by Kissflow and we recommend you do not remove or modify them as it will affect the functioning of the template.
Enter the name of the column header and use double curly braces to insert a process field as its value.
Note:
You cannot drag and drop a field while setting values for a specific field in a table. Make sure to use double curly braces to insert a specific process field as a value in a table.
Inserting an image
You can add or insert an image in the following three ways:
- From your desktop - Drag and drop the image from your local computer into the template editor
- From a web page - Right-click on the image and click Copy image address. Navigate to your template editor and click the Insert image icon. Right-click and paste the image address. Click Done. Hover over the image to format, resize, or delete the image as necessary.
- Copy & Paste - You can also simply do a "Command/Ctrl C + Command/Ctrl V" to copy and paste the images from your existing documents from Microsoft Word or Google Docs to your document template editor.
Tip:
You can also copy and paste text content from any external source into your editor.
Inserting a header and footer
A header appears at the top of a PDF document, whereas a footer appears at the bottom, or foot, of a page. Typically, these areas are used to insert document information such as the document’s name, headings, page numbers, images, date, etc., which are repeated on all document pages.
Here’s how you can add a header and footer to your document template:
- Click the Header & Footer button in the editor. A new editor window appears for the Header and footer. The height of the header and footer is determined by the top and bottom margins of the base canvas, which you can change using the Margins button. The header and footer can further have a top, and bottom margin, which you can configure inside the editor, and the maximum margin size is 400px. The base canvas determines the header and footer's left and right side margins and cannot be changed inside the editor.
- You can include the following things in the header and footer:
- Textual content.
- Images and static tables.
- Page number and page count.
Note:
You cannot insert a child table.
- Once you've added the necessary content, you can preview the document template by Saving it and clicking the Preview button.
Formatting options for number and date fields
If you have inserted a Number, Currency, Date, or a DateTime field, you can choose to format how all the values appear inside the document template using the Format option. Currency, Number, Date and timezone are the three formatting options available.
Note:
Any changes you make to the format are applied to all the fields inside the document template and not localized to one particular field.
Currency
You can format how currency values are displayed in the document template. You can choose between the currency code that appears after the value or the currency symbol before the value.
Number
You can format how numbers are separated inside the Number and Currency fields. You have four different types of separators to choose from. By default, the American style separator is applied. You can later change that by selecting another option depending on your preferred style.
Date and time zone
This formatting option allows you to format the way the date and datetime fields are displayed inside the document template. You can choose the time zone that needs to be followed. You can also change the date order by selecting the style suitable to your company. The multitude of formatting options allows you to customize it according to your needs. After choosing the desired formatting option, you can see the expected result on top of the formatting options.
Previewing a document template
Click Preview on the top of the editor after you complete drafting the template. You can maximize the preview screen, download the document as a PDF file, or open the link in a new tab.
Note:
The document template will be saved automatically when you preview it. However, you can also click Save to save your changes as necessary.
Associating a document template
You can automate the PDF generation by establishing a connection between the process and the document template you had recently created.
- Click the process connector and select the Generate a PDF document step from the available options.
- Set up a connection with the required account as necessary.
- After choosing a process, select the relevant process instance ID.
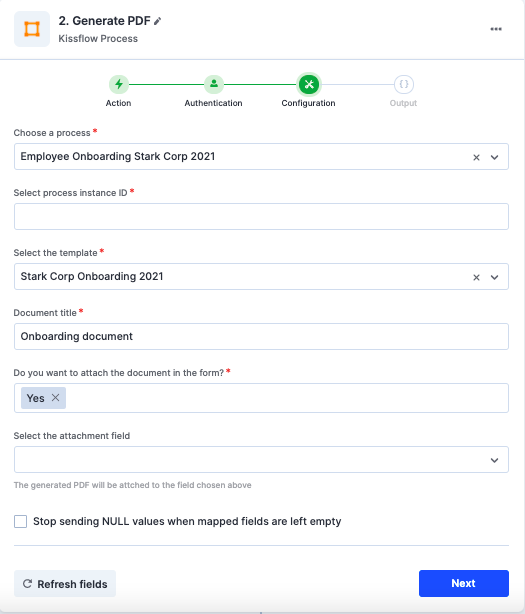
- Select the document template that has to be mapped to the process.
- Enter the title of the document and choose whether the document must be shared as an attachment in the process form. If yes, select the specific attachment field to which the generated PDF must be attached.
- You can refresh fields to view all the updated fields in the form. You can also map form fields from your trigger step or fields from your previous action steps. These values will be automatically added to the fields after the action is executed.
- Click Next
- Add a Kissflow Email connector to share the generated PDF as an attachment in an email.

- Enter the values of all the email-related fields and make sure to select the 'key' field under Attachments > Fields > Generate PDF.

- Activate the integration by toggling it ON.
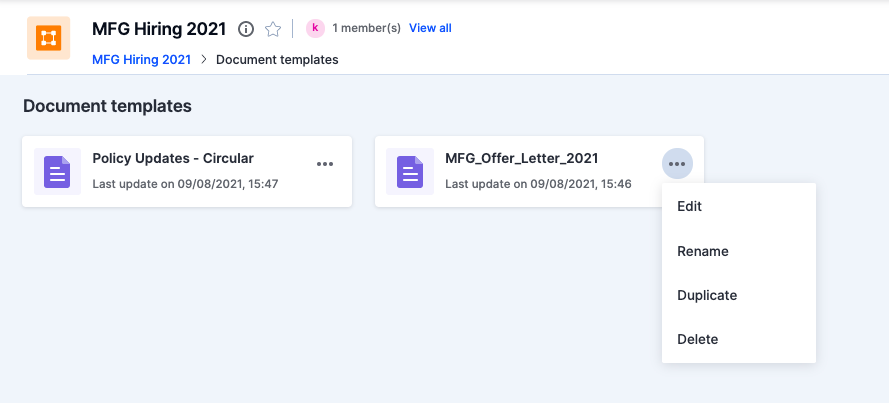
Managing a document template
- Navigate to your process and click the More options button (
 ) > Document templates
 - Choose your preferred template and click the More options button (
 ) > to edit, rename, duplicate, or delete the document template.
We support the following languages in document templates:
- English
- Italian (Italiano)
- Russian (Русский)
- German (Deutsch)
- Spanish (Español)
- French (Français)
- Brazilian Portuguese (Portuguesê (Brazil))
- Vietnamese (Tiếng Việt)
- Arabic