
 User guide
Creating and managing items

After a board and its form are set up for you to work, you can start creating new items.
Adding a new item
To add a new item to your board, click the + New button located at the top right section of the board. In your form that opens up, specify values for these fields:
- Assignee - select a member to whom you want to assign the item.
- Priority - set a priority. Priority can be set to Low, Medium, High, or Critical.
Note:
This field will be hidden if you have turned off priority in Settings. - Start date - select a date and time by which the item should start.
- Due date - select a date and time by which the item should be closed.
- Requester - select the user who has requested for the item.
- Depending on how you’ve set up the form, you will want to specify any other information you want to capture for your item.
- Click Submit.
Another way to create a new item directly in the Not started category is by clicking the New button (![]() ) and specifying the values. If you have more than one status in the Not started category, you can only create a new item in the first status by clicking the New button (
) and specifying the values. If you have more than one status in the Not started category, you can only create a new item in the first status by clicking the New button (![]() ).
).

All new items are listed in the table on your board. You can switch between different layouts to see details of specific groups of items. Click All to view all the items created in the board.
Creating items in bulk
You can copy and paste text inside a board to create multiple items at a time. Let's say you have a list of items on a notepad and want to create an item for every list item. Copy the list, go to any board layout and paste (Ctrl/Command + V). In the popup that appears, select a board field to map the title and click Create. You'll see the items created in the first status of the Not started category.
Note:
You can copy and paste only up to 20 items at a time.
You can also create items in bulk by importing from a CSV file.
Updating an item
To make changes to an existing item, open one from any layout. In the Details tab displayed on the right, make the required changes to the system fields and attributes such as status, assignee, and priority. Once the changes are made, you can close the form. All changes are auto-saved.
- Change status - select the new status from the Status dropdown to which the item has progressed towards.
- Change assignee - select another member to whom you want to reassign the item.
- Change priority - select a new priority from Critical, High, Medium, or Low in the Priority field.

Performing bulk-actions
You can also make updates to multiple items at the same time using certain bulk actions. These bulk actions are only available in the list layout.
To perform a bulk action, select the items you want to update from the table, and then click on one of the following:
- Change assignee - search for a member to whom you want to reassign the item. Click Update.
- Change status - select a new status from New, In Progress, Resolved, or Closed. Click Update.
- Change priority - select a new priority from Critical, High, Medium, or Low. Click Update.
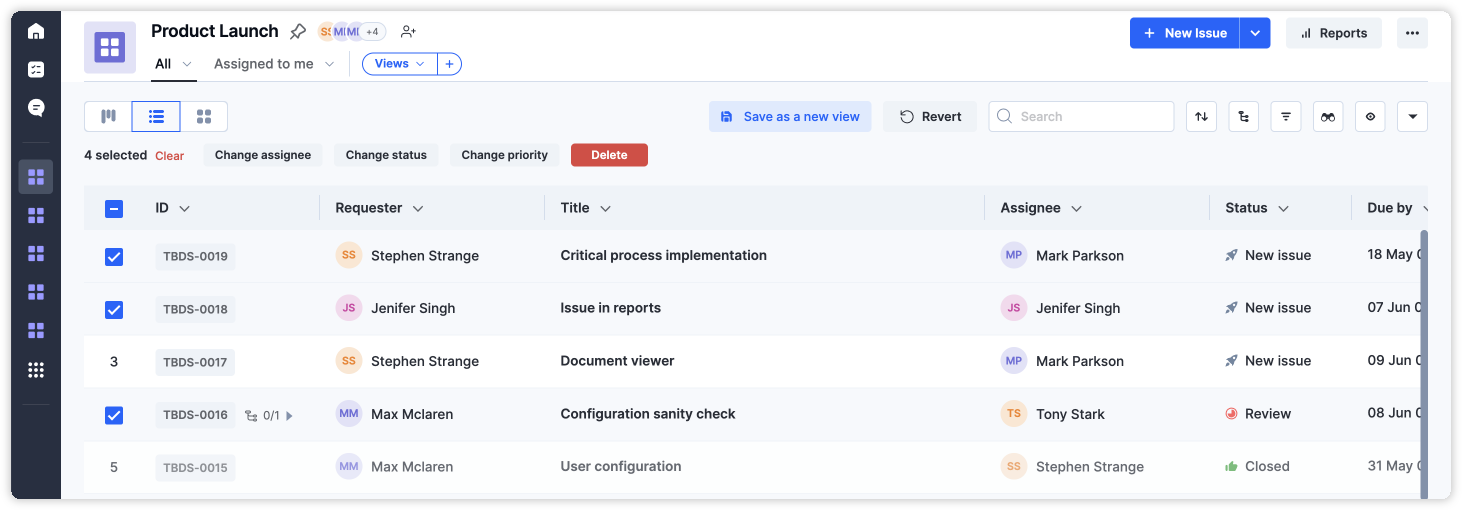
Deleting an item
To delete an item you no longer need, select an item in the board, and then click the Delete button.
You can also delete multiple items in the same manner. For bulk deletion of items, select multiple items that you want to delete, and then click Delete.
Alternatively, you can open an item from the table, click the More options button ( ) > Delete.
Cloning an item
If you want to create a duplicate of an item quickly, you can use the clone function. A cloned item will contain all the information captured in the original. However, it is an independent item and can be tracked and progressed differently.
- On your board, open an item.
- In the item form, click the More options button () > Clone.
