User guide
Creating and administering a list

You can create a list when you add a dropdown field, a checklist, or a multi-select field to your form.
Navigate to your Form editor and choose a field type (i.e. Dropdown, Checklist, etc.,) for which a list will be required to populate data.
Under the Select a list drop-down, you can either select an existing list or click Create a list to create a new list from scratch.
If you are creating a new list, enter the title of the list and proceed to feed a relevant description for it. Click Apply when you are done.
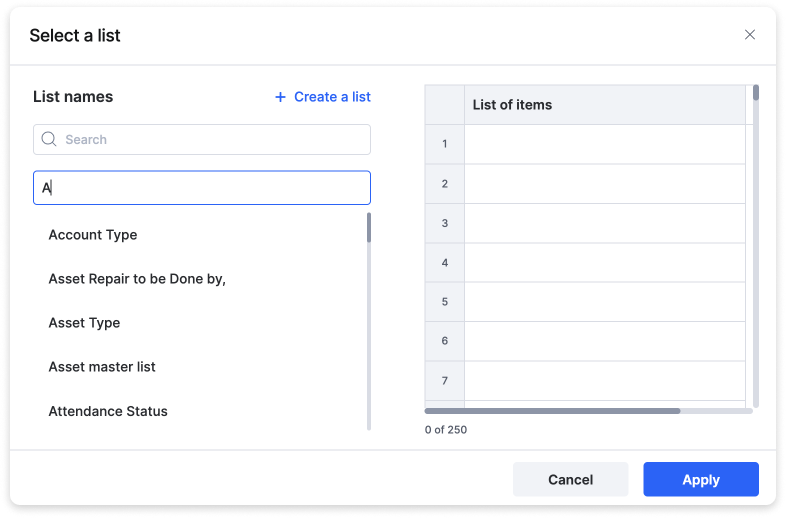
You will see a popup where you can:
name the list
give an optional description, and
add list values
Finding a list
You can find and access your list,
From the same form field that you used to create your list.
By using the Search bar on the top.
Renaming a list
To rename a list, go to the list home page and click on the name of the list. When finished, click Enter, or simply click off the name. You can change the description in the same way. All changes are auto-saved.
Editing list values
You can edit the values of the list directly from the list home page by clicking on the cells and making changes. Click Enter or Tab when finished and changes will be autosaved. You can also copy+paste values from a spreadsheet.
List values can also be edited when selecting them from the Form Editor. Open the dropdown, checkbox, or checklist field where the list is used, and click Edit list.
Note
A maximum of 250 items can be created or pasted within the list.
Managing members and their permissions in a list
You can share a list with your flow members and manage their permissions with the help of the Share settings inside a list.
You can assign roles to members to control what actions they can perform on your list.
There are two roles that you can assign to members:
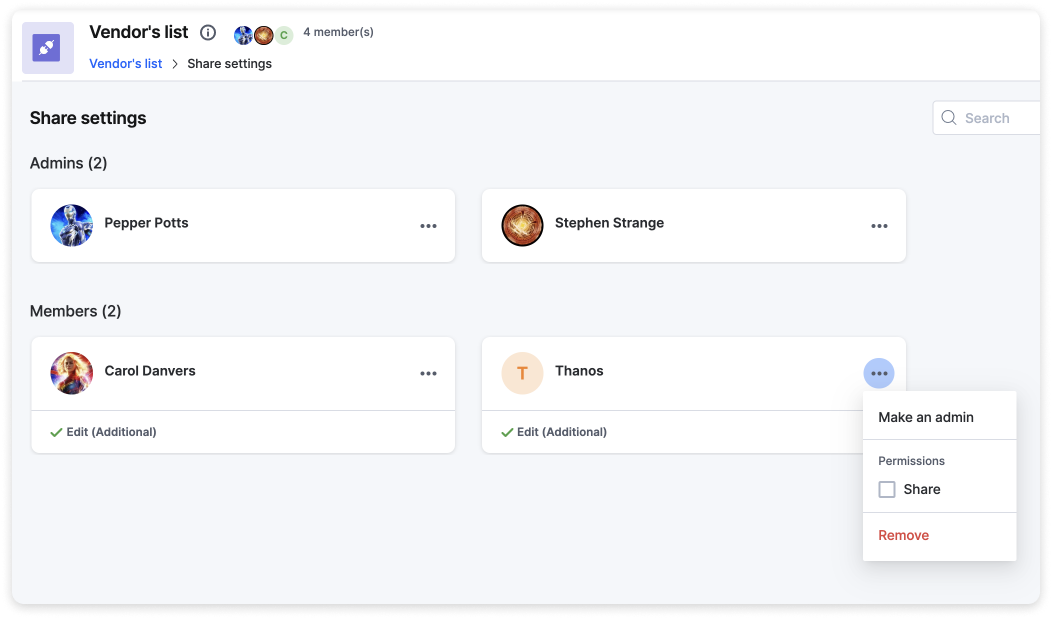
Admin - list admins can edit the values of the lists they own, modify their settings, and delete them as necessary
Member - list members can modify the values of a list or share it with other members based on the permissions granted to them by their admins.
Admins have more permissions than a member and can control various settings of a list.
The member who creates a list becomes its admin by default. As an admin of your list, you can add or remove members from it.
To manage members and roles, click the Share button ( ) on the list page. On the Share settings page, click + Add members to select and add members. To remove members from a list, select a member and click the More options button (
  ) > Remove. The member will not be able to access or view the contents of the list thereafter.
Duplicating a list
Click the More options button (
 ) on the list page
Click Duplicate
A popup will appear with the default name of the new list as Copy of <original list name>.
Change the name and click Duplicate.
Configuring security settings
The security settings define which flows can look up values in your list.
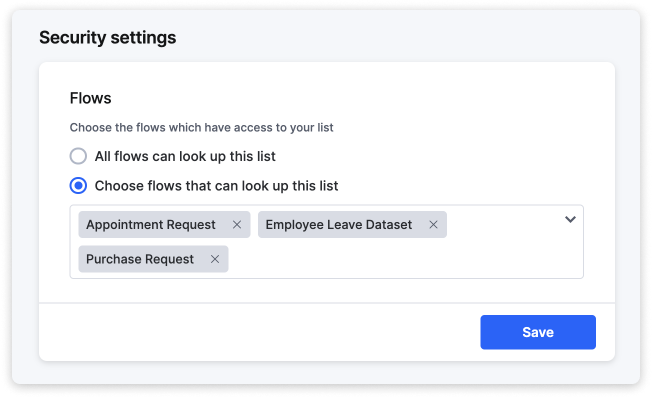
To update your list's security settings, click the More options button ( ) and then Settings. By default, all flows have access to your list. You can modify this behavior by selecting the second option, Choose flows that can look up this list, and select the flows you want to grant access to the list. To remove a flow, click the Remove button (
  ) next to the flow name. Click Save after setting your preference.
Deleting a list
Only a List Admin can delete a list.
Click the More options button (
) on the list pageClick Delete
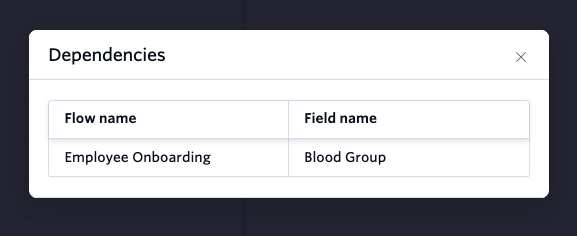
If a list is used by a flow, you will be prompted to remove its dependencies. After removing the dependencies, you can safely delete the list.
Seeing dependencies of a list
On the right side of the list is a section called Used by. This shows all the flows that currently use this list. When a list is associated with any flow you will not be able to delete it until you remove the dependencies.