
 User guide
HTTP connector

Basics of webhook
Webhooks are automated messages that are sent between applications as HTTP requests. They are a type of notification that contains detailed information about new events in an application. You can also trigger webhooks based on external events.
You can make fewer API calls overall by using webhooks, ensuring that your apps are more efficient and update more quickly.
Send data with HTTP connector
Kissflow can integrate with third-party applications through user-defined HTTP calls. When the trigger occurs, the webhook will send data to a specified URL in the form of an HTTP request. To set up a webhook, you need to have a URL where the webhook should send the data.
For instance, you can set up an integration where every time a task is completed in your Kissflow Project, a new entry is added on your Typeform app using webhooks.
Actions in HTTP connector
Actions |
Description |
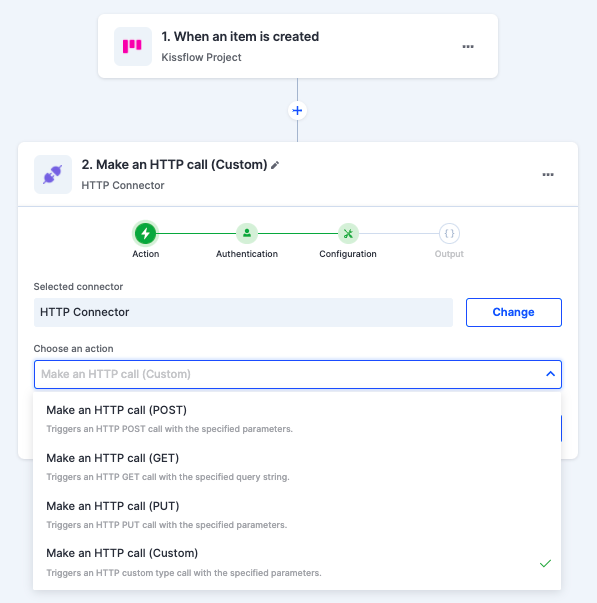
Make an HTTP call (POST) |
This action triggers an HTTP POST call with the specified parameters |
Make an HTTP call (GET) |
This action triggers an HTTP GET call with the specified query string. |
Make an HTTP call (PUT) |
This action triggers an HTTP PUT call with the specified parameters |
Make an HTTP call (Custom) |
This action triggers an HTTP custom type call with specified parameters |
Configuring your HTTP connector
- In your Kissflow account, click your profile picture on the upper right corner of the screen and click Integrations. Click the New integration button to provide a name and description for your integration.
- Inside the editor, configure a trigger connector, such as Kissflow Project and select a relevant trigger event.
- Once the trigger is setup, search for the action connector, HTTP.
- Kissflow HTTP connector provides GET, POST, PUT, and custom HTTP methods with automatic data parsing allowing you to post to your webhooks from Kissflow. Choose any one of the actions based on your requirement.
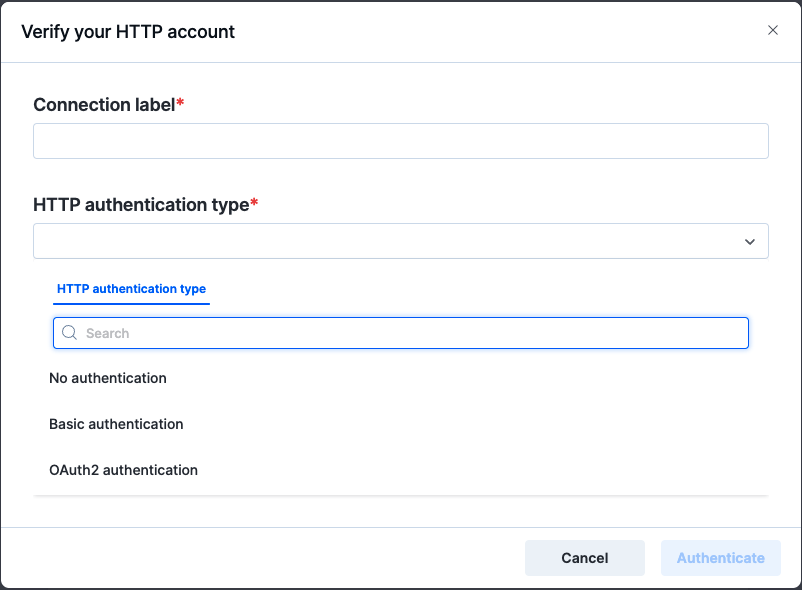
- You can authenticate your HTTP connector using three authentication types:
- No authentication: This doesn't require any authentication.
- Basic authentication: This requires you to enter a username and password.
- OAuth authentication: This requires you to supply details like:
- Access token: used to authorize and authenticate while gaining access to resources on the OAuth provider application.
- Callback URL: The Kissflow URL to which the redirection happens after a successful authorization. This will be auto-populated and can't be modified by the user.
- Authorization URL: The API authorization endpoint of the OAuth provider.
- Access token URL: The endpoint for authorization server. This is used to exchange the authorization code for access token.
- Client ID: The unique alphanumeric string that you received from the OAuth provider while registering Kissflow as a client.
- Client secret: The secret string that was obtained by Kissflow during the client registration process.
- Scope: The OAuth scope that Kissflow might need to request for the access of the OAuth application.
- State: An optional value that is used for preventing cross-site request forgery.
- Next, go to your external application and copy the unique hook URL provided by the application.
- HTTP requests from a webhook include four things:
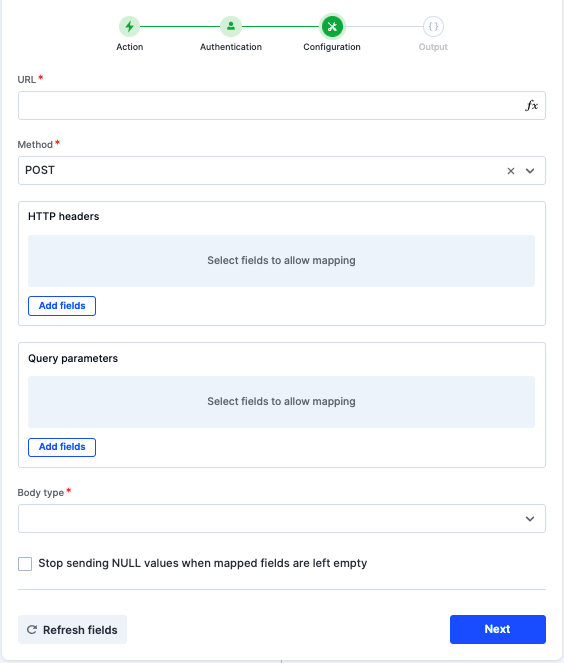
- URL: This is the exact path where you want to send the data. Paste the copied hook URL from your external application here.
- Body parameters: The information you want to send to another app. This is sent as a key-value pair.
- HTTP headers: This will specify how the information in the body is formatted. This is sent as a key-value pair.
- Query parameters: They are the optional key-value pairs that appear in the URL after the question mark. They are essentially URL extensions that are used to help determine specific content or actions based on the data being delivered.
- If you've selected a custom HTTP call, you'll have an option to select the HTTP method and body type. Body type can be raw or URL encoded data.
- The null values are shared by default when mapped fields are left empty. Enable the checkbox to stop sending null values.
- When the third-party application receives the HTTP request from the webhook, it will send a response, informing your action connector whether or not the request was successful.
- Test the action to complete the setup.
Sending files using the HTTP connector
You can also send files or attachments using the HTTP connector. It only works with the Custom action. Here's how you can do it:
- After configuring your trigger, choose Make an HTTP call (Custom) as the action and enter the URL to which the webhook needs to send the data.
- Choose POST as the method, and add the relevant fields under HTTP headers and Query parameters if required.
- Choose Form Data as the body type. Add the key name and map the respective field as its value. You can add multiple Key-Value pairs to the Form Data.
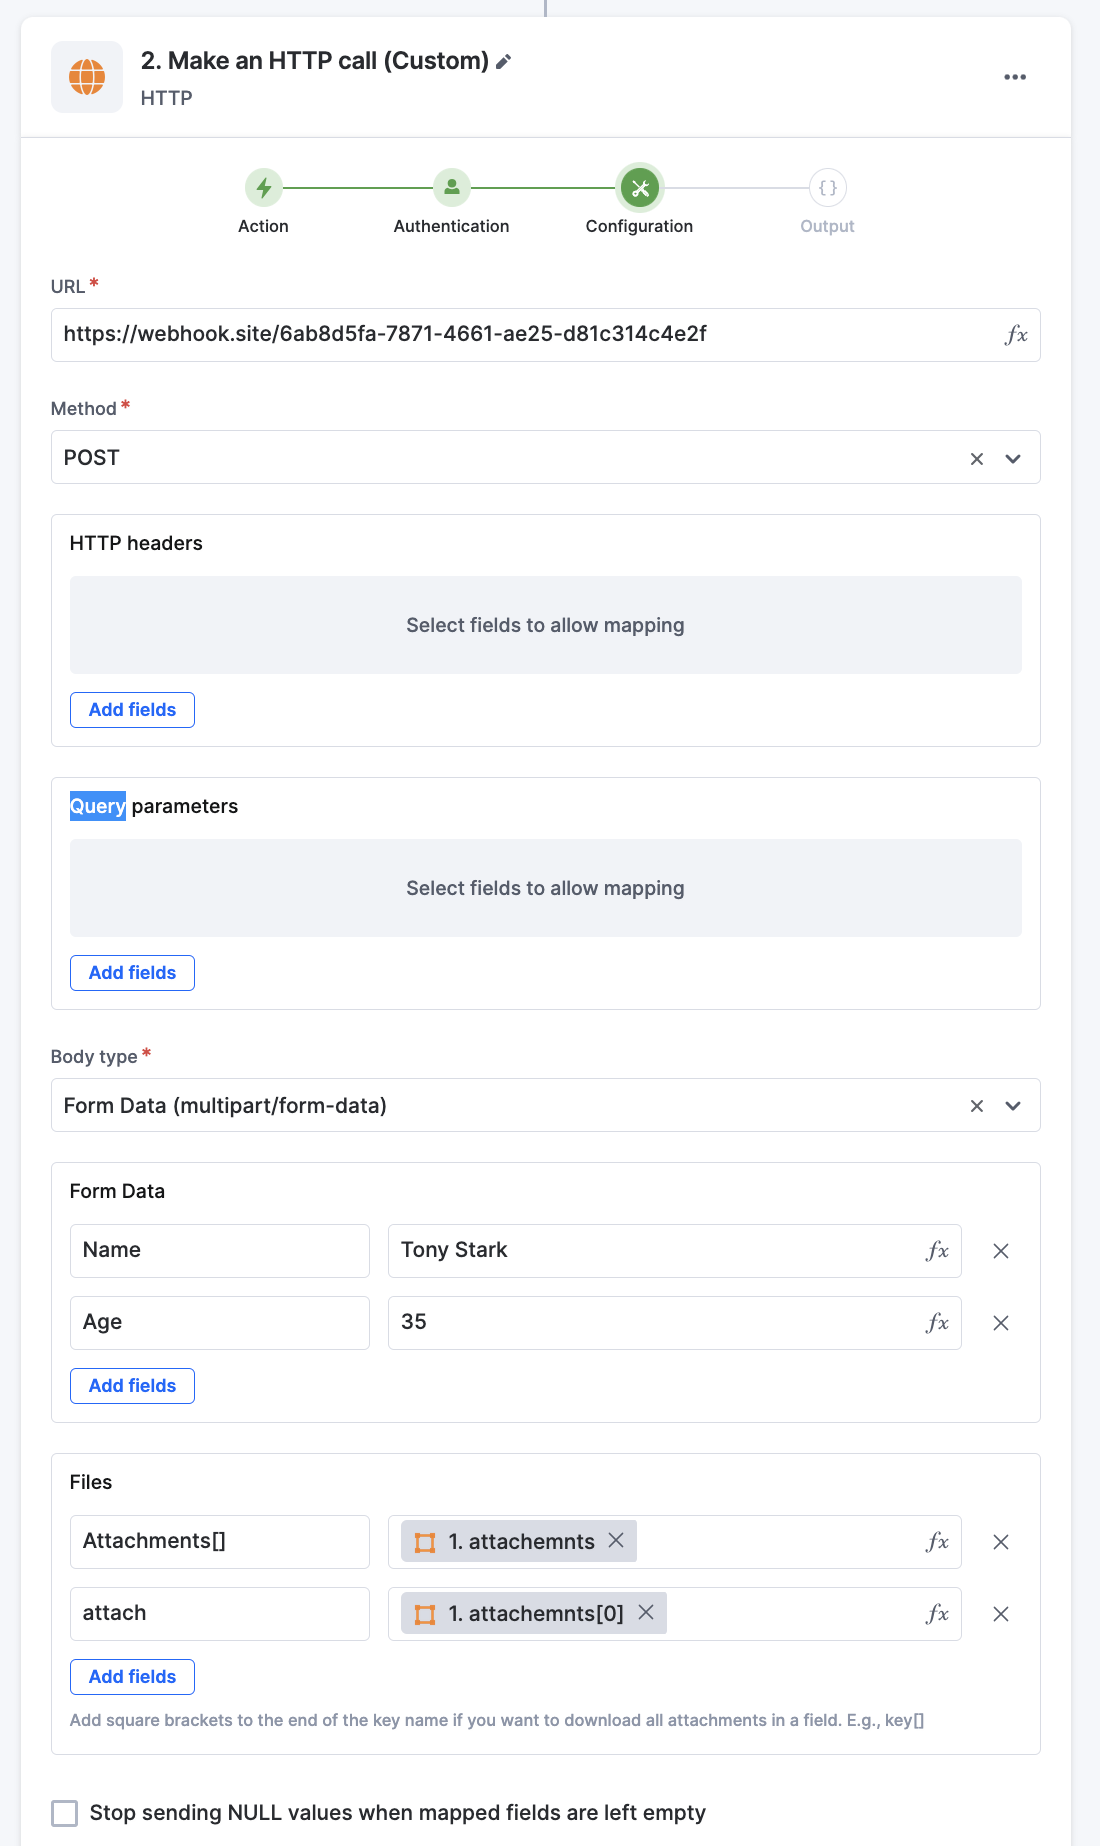
If a particular key has multiple attachments, add square brackets at the end to send all the attachments to the respective URL. E.g, Attachments[]
Activating the webhook connector
After configuring your integration workflow, turn ON the toggle button on the upper-right corner of the editor to activate the integration.