
 User guide
Adding and managing users

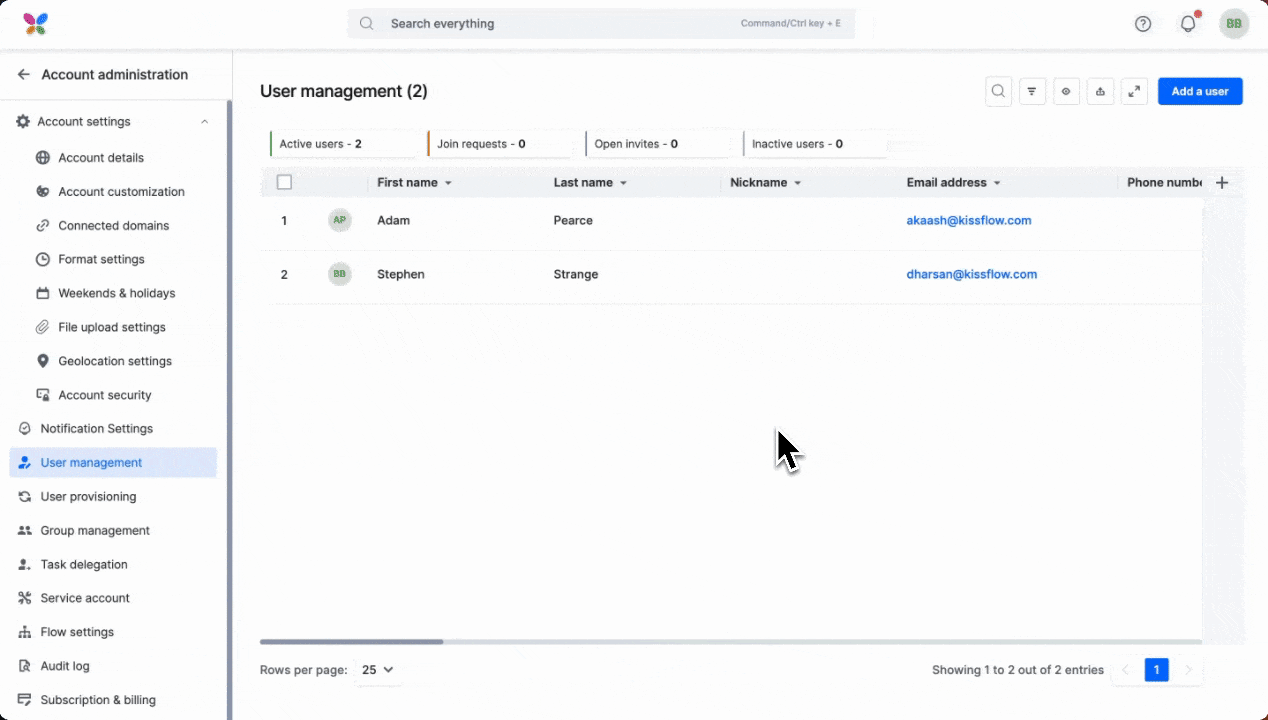
Super Admins, IAM Admins, and User Admins have access to the User management page where they can activate, deactivate, delete, and change the roles of users from your Kissflow account. They also can resend verification emails to unverified users and send reset password emails to users whose passwords need to be changed. Adding and removing users from groups is available inside user management. Assigning and reassigning a manager to multiple users is also available. Every action has a summary page totaling the list of changes done, the number of users skipped, and the reason why. The User management table allows you to change all the users in your Kissflow account simultaneously.
Adding users manually
Only Super Admins and User Admins can add users in a Kissflow account. Go to Account Administration > User management to add users one by one.
- Click Add a user
- You'll see a popup where you can enter the details of the new user:
- The first name and email address are mandatory. You can assign a user role based on their roles within the Kissflow account.
- You can tag the new user with a preconfigured group. Learn how to create a group.
- You can tag the user with a manager, which can also be used in step assignments.
- You can also choose to send or not send an email invite to this user.
- Click Add to create a user and exit.
User provisioning with SCIM
As a Super Admin, or an IAM Admin, you can configure SCIM to enable automatic user provisioning with Identity Providers (IdPs):
Selecting and deselecting users
Account Admins (IAM and User Admins) can either select a single user from the user management table or multiple users and perform batch actions on the selected group of users. All the actions in the user management table support the ability to perform batch actions. Account Admins can also select all the users on a particular page by clicking the checkbox to the left of the first column in the user management table. You can configure the number of rows that appear on a single page by changing the Rows per page on the bottom left-hand corner of the user management table. To select all the users in your user management table irrespective of the pages, choose a single user and then click Select all rows next to the user management actions. To deselect a user, uncheck the checkbox next to the user or click Clear selection to deselect everything.
Performing batch actions
Account Admins can use the user management table to perform batch actions. All the actions inside the user management table support the functionality to perform batch actions. Follow the steps below to perform batch actions:
- Select the users by checking the checkbox next to the first column in the user management section, in our instance, it is the First name. You can use simple or advanced filters to filter users. To select all the filtered users on a page, click the checkbox next to the column names. To determine all the filtered users, click the checkbox next to the user and then click Select all rows to select all users.
- Select the action you want to perform from the top navigation bar. All the user management actions support batch actions. To change any custom fields you created, click the More options button (
 ) and scroll down to find the respective custom field name. Click the custom field you want to change and enter the new value.
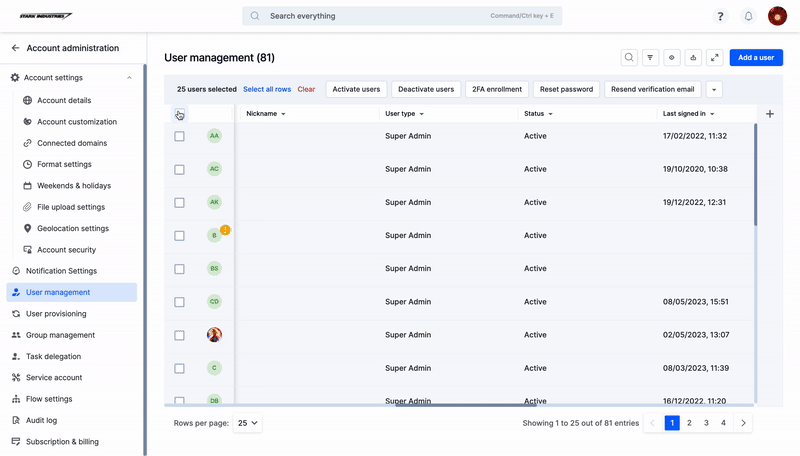
Inviting users
When you invite someone to join your account, they will get an invitation email sent to the address you entered. If the user accepts the invitation and your account has enough user licenses, they will be activated automatically, or you can manually assign an active license to the user. To do this, select the checkbox of the user and click Activate. You can activate multiple users at once. We will activate all selected users if your account has enough user licenses. The user count is automatically updated in the Active Users tile. However, if your account doesn't have enough licenses, the user will be added to the account in an inactive state and won't be allowed to Sign in.

Sending email invites to users
When users are added in bulk using SCIM or any directory sync, the Account Admin can choose whether or not to send email invites to these users by clicking the check box. Once all users have been added to the account, you can select multiple users and manually activate them. Alternatively, you can follow the method below to resend an email invite to various users.

Resend verification email
To resend the verification email to a user, select the checkbox beside the user's first name and click Resend verification email. A verification email will be sent to the selected users. Users who are already verified or inactive will not receive an email. A summary page will appear showing the number of users who received an email and those who didn't, along with the reason why after the process is complete.

Assigning a manager
Users can be assigned a manager, which can be helpful in step assignments. You can select multiple users and assign them a typical manager. If certain users already have a manager, the existing manager will be replaced by the newly chosen one. Select the users in the checkbox beside their name and click Assign Manager from the More options button (![]() ). Select the user you want to assign as a manager and click Assign.
). Select the user you want to assign as a manager and click Assign.
Resetting a password
Select the checkbox beside the user to reset other users' passwords and click Reset password. Users will receive an email with a link to reset their password, which they must open within 24 hours before the link expires. Users will also be signed out of their Kissflow accounts and won't be allowed to Sign in unless they set their password. You cannot reset your password using this method. There are some instances when users don't receive a reset password email. Below are the following:
- Unverified users do not receive a reset password email.
- Inactive users will also not receive a reset password email.
- If Sign in with Kissflow is disabled in Sign in preferences, you cannot send a password reset email.
Managing user data
As a Super Admin, or a User Admin, you can manage user data in your account. Go to Account Administration > User management to modify the attributes of a user directly. You can instantly click the user you want to alter and update the value from the tab on your right. Your changes are saved automatically. If you update the email address, the user must verify the new one before they can re-access their Kissflow account. You can click the Resend verification email button to resend an email invite to the user. If you have hidden some fields using the Show/hide field button (![]() ), those fields won't appear on the right tab.
), those fields won't appear on the right tab.
Deactivating and activating users
As a Super Admin, or a User Admin, you can activate and deactivate users in your account. Select the checkbox beside the user to deactivate a user and then click Deactivate. Once a user is deactivated, the count is updated automatically in the Inactive users' tile. Inactive users are allowed to Sign in once you activate their account.
You cannot deactivate Account Admins. They must be downgraded to a user before proceeding to deactivate them. If you have selected a mix of users and Account Admins, you can skip the Account Admins and deactivate only the users. Select the checkbox beside a user to activate an inactive user and click Activate. The user count is automatically updated in the Active users' tile. If you have run out of licenses, you can either upgrade your plan or purchase additional licenses to activate all the selected users.
What happens after a user is deactivated?
- Their license will be revoked, but we will temporarily retain their data in the system before removing it.
- It is recommended that the Flow Admin reassign the items currently assigned to the user (deactivated) to another user. Item reassignment can be done using the Admin actions tab under My Items.
- If the deactivated or deleted user is the Flow Admin themselves, then a new Flow Admin has to be chosen by the Super Admin.
Note:
In the case of the Account Owner, the Account Owner must transfer the ownership to another Super Admin before you can deactivate them.
Deleting users
As a Super Admin, an IAM Admin, or a User Admin, you can delete users from your account. Deleting users removes them from your account. When you delete users, you lose all the data associated with them. Select the checkbox by their name to delete a user and click Delete users. The user count is automatically updated. Similar to the Deactivate action, you cannot delete Account Admins directly.
Two-factor authentication (2FA) enrollment
Two-factor authentication (2FA) provides an additional layer of security to your Kissflow account by requiring more than just a password to Sign in. As a Super Admin, or an IAM Admin, you can enroll multiple users in your account for 2FA. This feature is only available in the enterprise plan.
Here are the different 2FA enrollments:
- Recommended: Users can decide whether to turn on or off 2FA for their account.
- Mandatory: This 2FA enrollment makes 2FA mandatory for signing in.
- Disabled: This is the default 2FA enrollment. 2FA will not be available for such users.
Adding and removing users from groups
Groups are created in Kissflow to streamline administration and allow easy sharing of processes, boards, apps, integrations, and datasets. Groups can be created and managed separately in group management. As a Super Admin, or User Admin, you can add or remove users from existing groups in the user management table. Select the users you would like to add or remove by selecting the checkbox next to their name and choose Add users to groups to add or Remove users from groups to remove the selected users.
A Popup with the list of existing groups appears. Select the required groups to complete the chosen action. Kissflow only makes changes to users who are a part of a group. For example, if you try to add a user who is already a part of the group, the action won't take place, and the user will be skipped.
User role change
A user's role determines the functions they can perform inside Kissflow. To change the user role of a particular user, select the checkbox beside a user and select Change user role from the More options button (![]() ). Choose the new user role and click Change role. Only Super Admins, and IAM Admins can assign or remove the roles of all the user roles in your account. Only Super Admins can make another user a Super Admin.
). Choose the new user role and click Change role. Only Super Admins, and IAM Admins can assign or remove the roles of all the user roles in your account. Only Super Admins can make another user a Super Admin.