
 User guide
Data table view

A data table view displays your form data as a table, with the data form fields displayed as column headings and the data gathered by each field displayed as rows.
Tip:
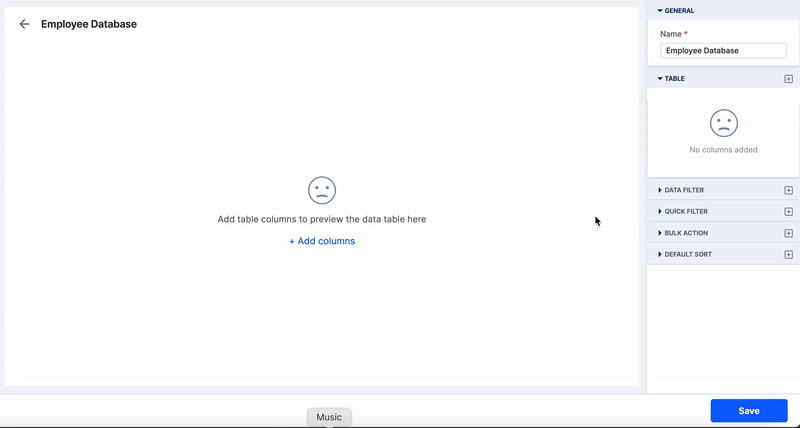
Assume you're developing an app to collect and manage employee data. You can collect data using a data form and then analyze it using a data table view. You can then manage and use this view within a page.
Creating a data table view
- Navigate to the data form, and click Views.
- Click Create a data form view.
- Choose Data table.

Configuring the data table
You can configure the data table view using the following settings:
General settings
Under Name, enter a table name of your choice. By default, the table name will be the name entered while creating the data table.
Table settings
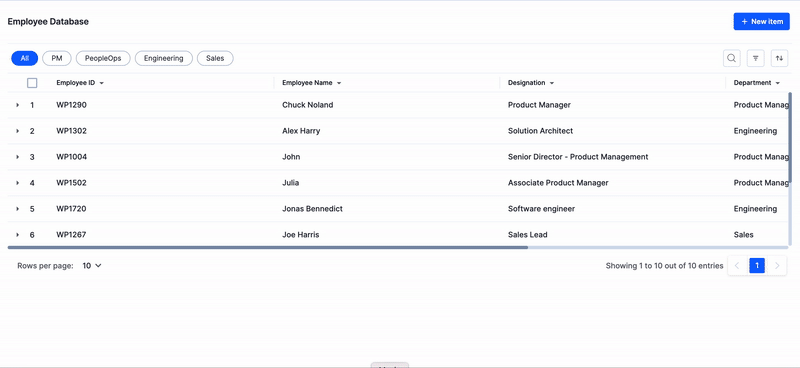
- Add columns to the table by clicking the Add icon(
 ). You can choose the columns from the form fields or the system fields. Click Select all to add all the fields as columns in the table.
For example, let us consider your data form consists of fields such as Employee ID, Name, Designation, Manager, Blood Group, CTC, Date of Joining, Hobbies, etc. If you wish to hide CTC and Hobbies in the view, you can click Select all fields and then specifically delete these fields to show only the other data. This is helpful when you have large chunks of data to be shown. Alternately, if you wish to show only a few fields such as Employee ID, Name, and Designation, select the specific fields.
- In Manage columns, the columns can be rearranged by dragging and dropping and can be deleted if the columns are not required.
- There are two table types:
- Basic: By default, the basic table type is chosen. It lists all the columns chosen. Here, each column is separate and independent of other columns.
- Advanced: In the advanced type, there are primary columns and secondary columns. The primary columns form the table columns and the secondary columns are part of and dependent on the primary column.

Data filter
In Data filter, using Advanced filters, you can determine the conditions to show a particular data. In an advanced filter, you can select a field, select an operator such as Equal to, Not equal to, Part of, etc, select if it is either a value or a field, and match it with a specific value or field. You can also add conditions such as AND/OR to the filters.
Here, we have filtered the employee data based on their Department and Date of Joining. AND condition is used to filter employees who have worked for more than 5 years.

Quick filter
A Quick filter helps you view the filtered data in a separate tab. The filters added can be rearranged by dragging and dropping. Quick filters can also be configured within a page where the data table view is used. It can be turned on/off inside the page.
For example, here we have added a quick filter to filter all the employees under a specific department and viewed it in a page.

Bulk action
Using Bulk action, you can add JavaScript code to your data table. You can select all rows or specifically select the rows to perform these actions. You can add one or more bulk actions and reorder them if required.

Here, we have created a bulk action to show the blood group composition of the employees using reports.
Sort
You can sort the data by selecting a column for which you want to apply the sort. The data can be sorted either in ascending or descending. Sorting can also be done by clicking the down arrow button( ) in the specific column.
Import
Using Import CSV, you can import large amounts of data into your data table. Click here to know more about the feature.