
 User guide
Webhooks by Kissflow

Basics of webhook
A webhook (also known as a web callback) is a method for any software to provide real-time information to other applications. Webhooks allow you to build or set up integrations, which subscribe to certain events on your application. When one of those events is triggered, we'll send an HTTP POST payload to the webhook's configured URL. It differs from typical APIs in that you would not need to poll for data very frequently in order to get it in real-time.
Working with Webhooks by Kissflow
Kissflow can integrate with third-party applications through webhooks, or user-defined HTTP callbacks. For third-party applications to consume Kissflow's webhook, we provide a URL to deliver requests to. Locate the webhooks' settings page for the app you want to connect to Kissflow.
In your application's webhook settings, you'll typically choose to add a new webhook connection. Paste the webhook URL you copied from Kissflow Webhooks connector, select any options that the application offers—including which data you want to receive via the webhook—and save your changes.
For example, you can set up an integration where every time a new purchase request is raised in your ERP software, you can start an approval process in Kissflow (action). Or, you can set up an integration where any new email subscriber in MailChimp can be added to your Google sheet automatically. You're only limited by your imagination.
Learn how to send data to other applications using HTTP webhook connectors.
Triggers in Webhook connector
Trigger |
Description |
Catch a webhook (POST) |
This generates a callback URL and listens it to receive payload from other applications |
Configuring your webhook
In your Kissflow account, click your profile picture on the upper right corner of the screen and click Integrations. Click the New integration button to provide a name and description for your integration.
In the editor, select the Webhooks by Kissflow trigger. You can also use the search to find the trigger directly.
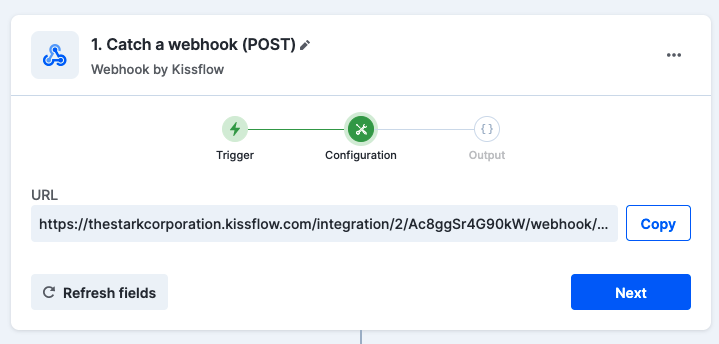
- Click the Trigger dropdown menu, select Catch a webhook (POST) and click Next.
- Catch a webhook works by giving you a unique URL that you can make POST requests to. Copy the URL and paste it in your application's core settings or options page. If you can't find it, look through your app's help and support documentation. Click Next.
- The app that's connected to your webhook URL will send data to it whenever something new is added. To test a webhook trigger, you must first add something new to your app. For example, if you're connecting to Trello, you could add a new card to your Trello board. The connector will start listening to the URL and fetch any payload from the application.

- If your data sent to the webhook URL is found, the step will show it was successful as well as the data received.
- The data received by the webhook connector can then be consumed by other applications to perform specific actions.
Activating the webhook connector
After configuring your connector, turn ON the toggle button on the upper-right corner of the editor to activate the integration.