
 User guide
Creating and customizing a board form

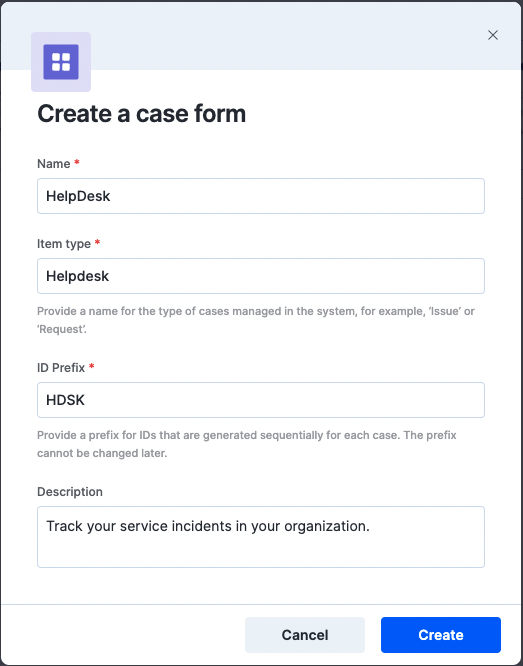
To create a board form inside your Application builder,
- Click Boards > Create a board form.
- Enter the board form's name. You can also optionally add a description and category to help you organize and find your process later.
- Click Create.
Building a board form
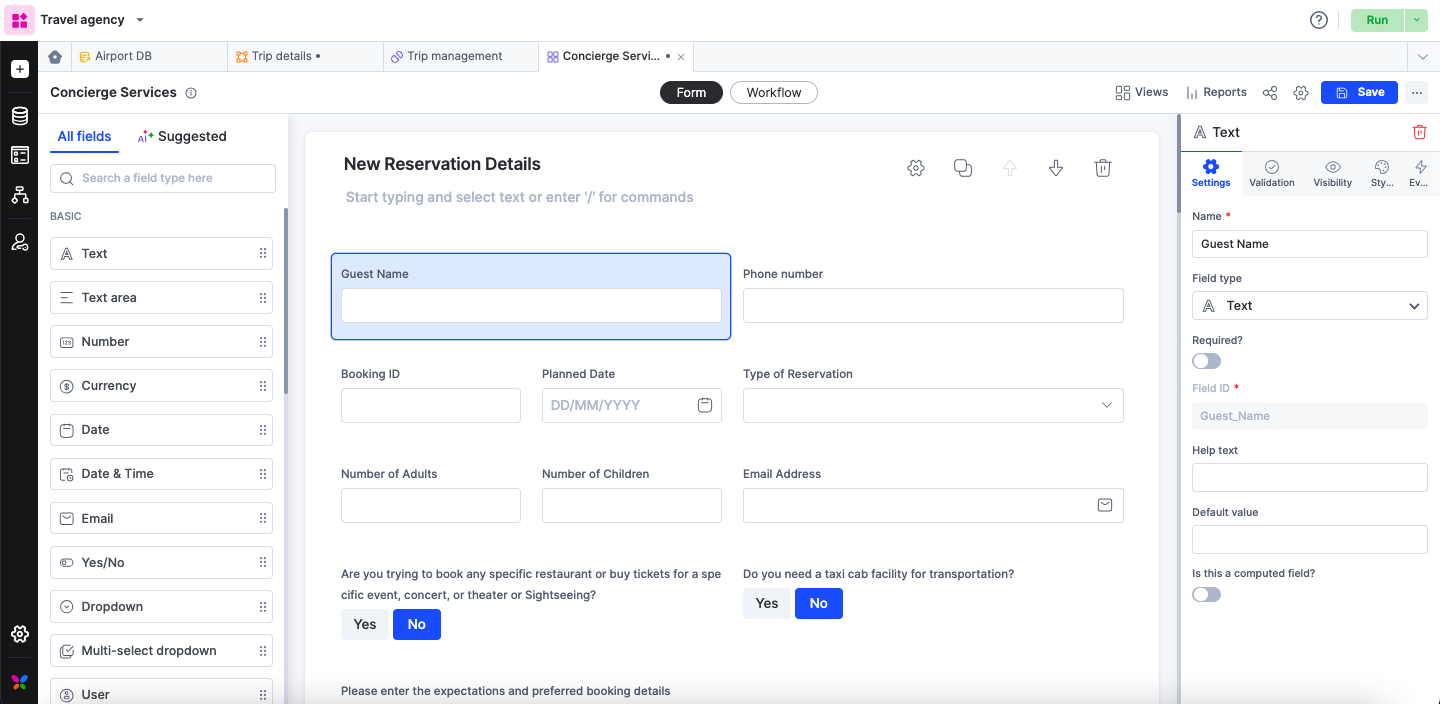
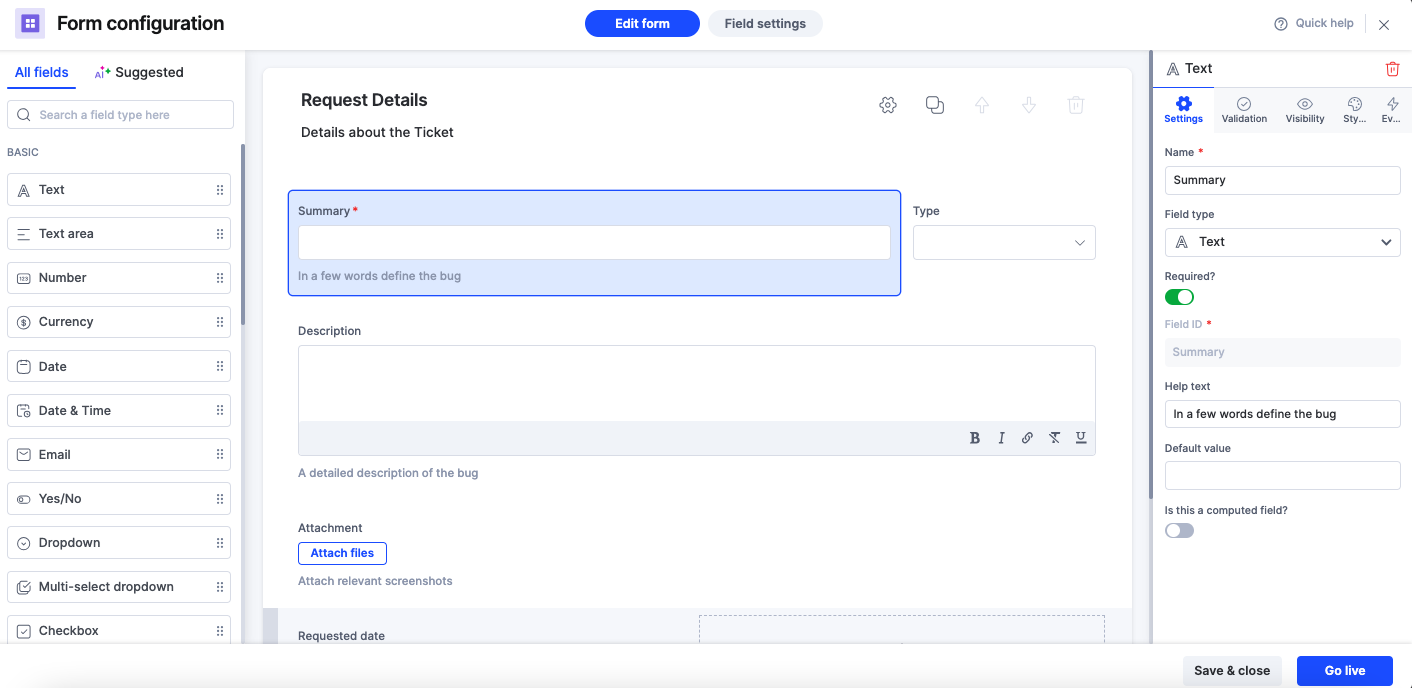
After creating a process form, you'll land on the process form editor screen. The basic form, workflows, permissions, reports, roles, and settings are handled on the left side of the editor. The form appears on the center and the fields are provided on the left side of your editor. You can either click within the form or drag and drop the fields onto the form directly. Once the form is set up, click Save to make it available inside the application.
Renaming, duplicating, and archiving a board form
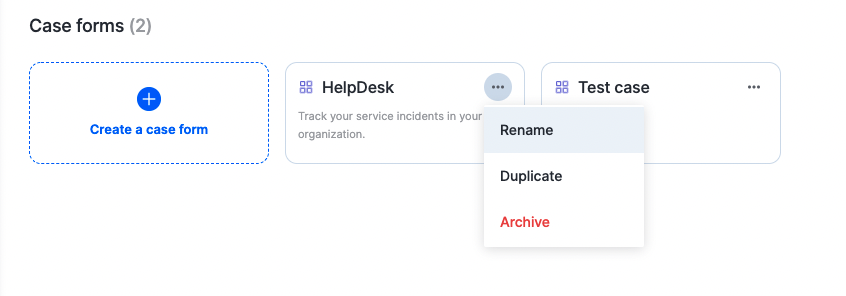
To rename your board form, simply click the More options button ( ) on your board form. Click Rename. Change your form's name and description. Similarly, click Duplicate to create a clone of your board form and Archive to delete it temporarily.
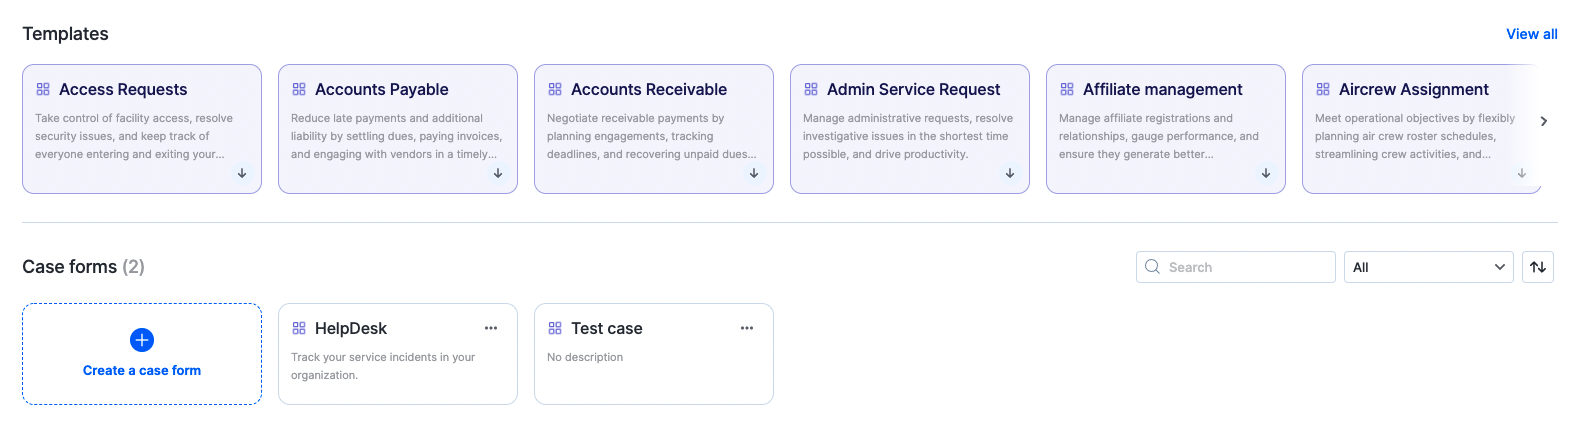
Finding a board form
All the process forms that you create sit on the board gallery. Use the search bar to quickly find a specific board form.
Forms let you define what data is necessary to move an item through your board. They are made up of sections, fields, and tables.
Sections
Sections are groups of fields. They are useful to help make the form easier for users to complete. Additionally, you can control all of the field permission settings as a group instead of individually.
In a new form, the first section is called the Untitled section. To rename it, just click on the name. You can also add a description to help users. Add rich text including images and videos by clicking the Text formatting button ( ).
).
To add a new section, click Add section.

Click the Settings button( ) to change the visibility settings. By default, the section will always be visible, but you can change it to hidden. You can make the section conditionally visible by clicking +Add a visibility rule. To add a condition, choose a Field, Operator, Type, and map it to a value or a field based on the type. You can add multiple conditions.
To duplicate a section, click the Duplicate button ( ). A copy of the section will be created below.
Click the Up arrow ( ) or Down arrow (
 ) to rearrange the sections.
Click the Delete button ( ) to delete the entire section.
Fields
Fields are the building blocks of your form. They are the individual pieces of data you want to collect. Kissflow forms have 27 different types of fields to capture several kinds of data.
Click any field type to add it to the bottom of the current section you are working on. Or, you can drag and drop any type of field to the exact place in the form you want it. You can also click the place in the form where you want to add a field and a new one will pop up.
The form will look exactly like you create it here for a user. To rearrange fields, drag and drop them where you want them to go. You can move individual fields or an entire row of fields. Fields can be resized to any dimension you need. Drag to resize the width of the field. Rows can have up to six fields.
Tables
A table acts as a separate section and lets you collect an unlimited set of similar data. To add a table, click Add table. Click the Add button to add a new field. You can add as many fields as you want to a table.
You have the same options for tables as you do for sections. Additionally, in the table settings, you can set validations to control the minimum and the maximum number of rows that must be completed.
