
 User guide
DocuSign connector

What is DocuSign?
DocuSign is an electronic signature technology and digital transaction management service for facilitating electronic exchanges of signed documents.
About Kissflow's DocuSign integration
The DocuSign connector of Kissflow Integration enables you to connect your DocuSign account with Kissflow apps. You must have a valid DocuSign account and be a paid Kissflow customer to integrate with DocuSign.
Assume you use Kissflow to sign employee agreements digitally as a final step before inducting new hires. Using the Kissflow process as a trigger and adding DocuSign as an action, you can create a new agreement every time an item completes its workflow.
Triggers in DocuSign connector
Trigger events |
Description |
When an envelope signing is completed |
Triggers when an envelope signing is completed
|
Actions in DocuSign connector
Action events |
Description |
Create an agreement using a document |
This action creates and transmits an agreement in PDF format based on the uploaded document.
|
Create an agreement using a template |
This action creates and transmits an agreement using a template |
DocuSign connector as an action step
- Inside your Kissflow account, click your profile picture on the top right corner of the screen and click Integrations from the dropdown. Next, click the New integration button to provide a name and description for your integration.
- Once inside your editor, set up a trigger and action steps as necessary, for example, your trigger event can be When an item advances to the next step.
- After setting up your trigger and action step above, click the Add button (
) next to set up your action step. Search for the DocuSign connector and select the desired action from the above list.

- After choosing your action event, authenticate the connector. Click +Add an account and sign in using your DocuSign account. Kissflow uses DocuSign’s OAuth for authentication.
- After authenticating with your DocuSign account, add relevant values against the DocuSign form fields. You can hit Refresh fields to view all the updated fields in the selected DocuSign form.
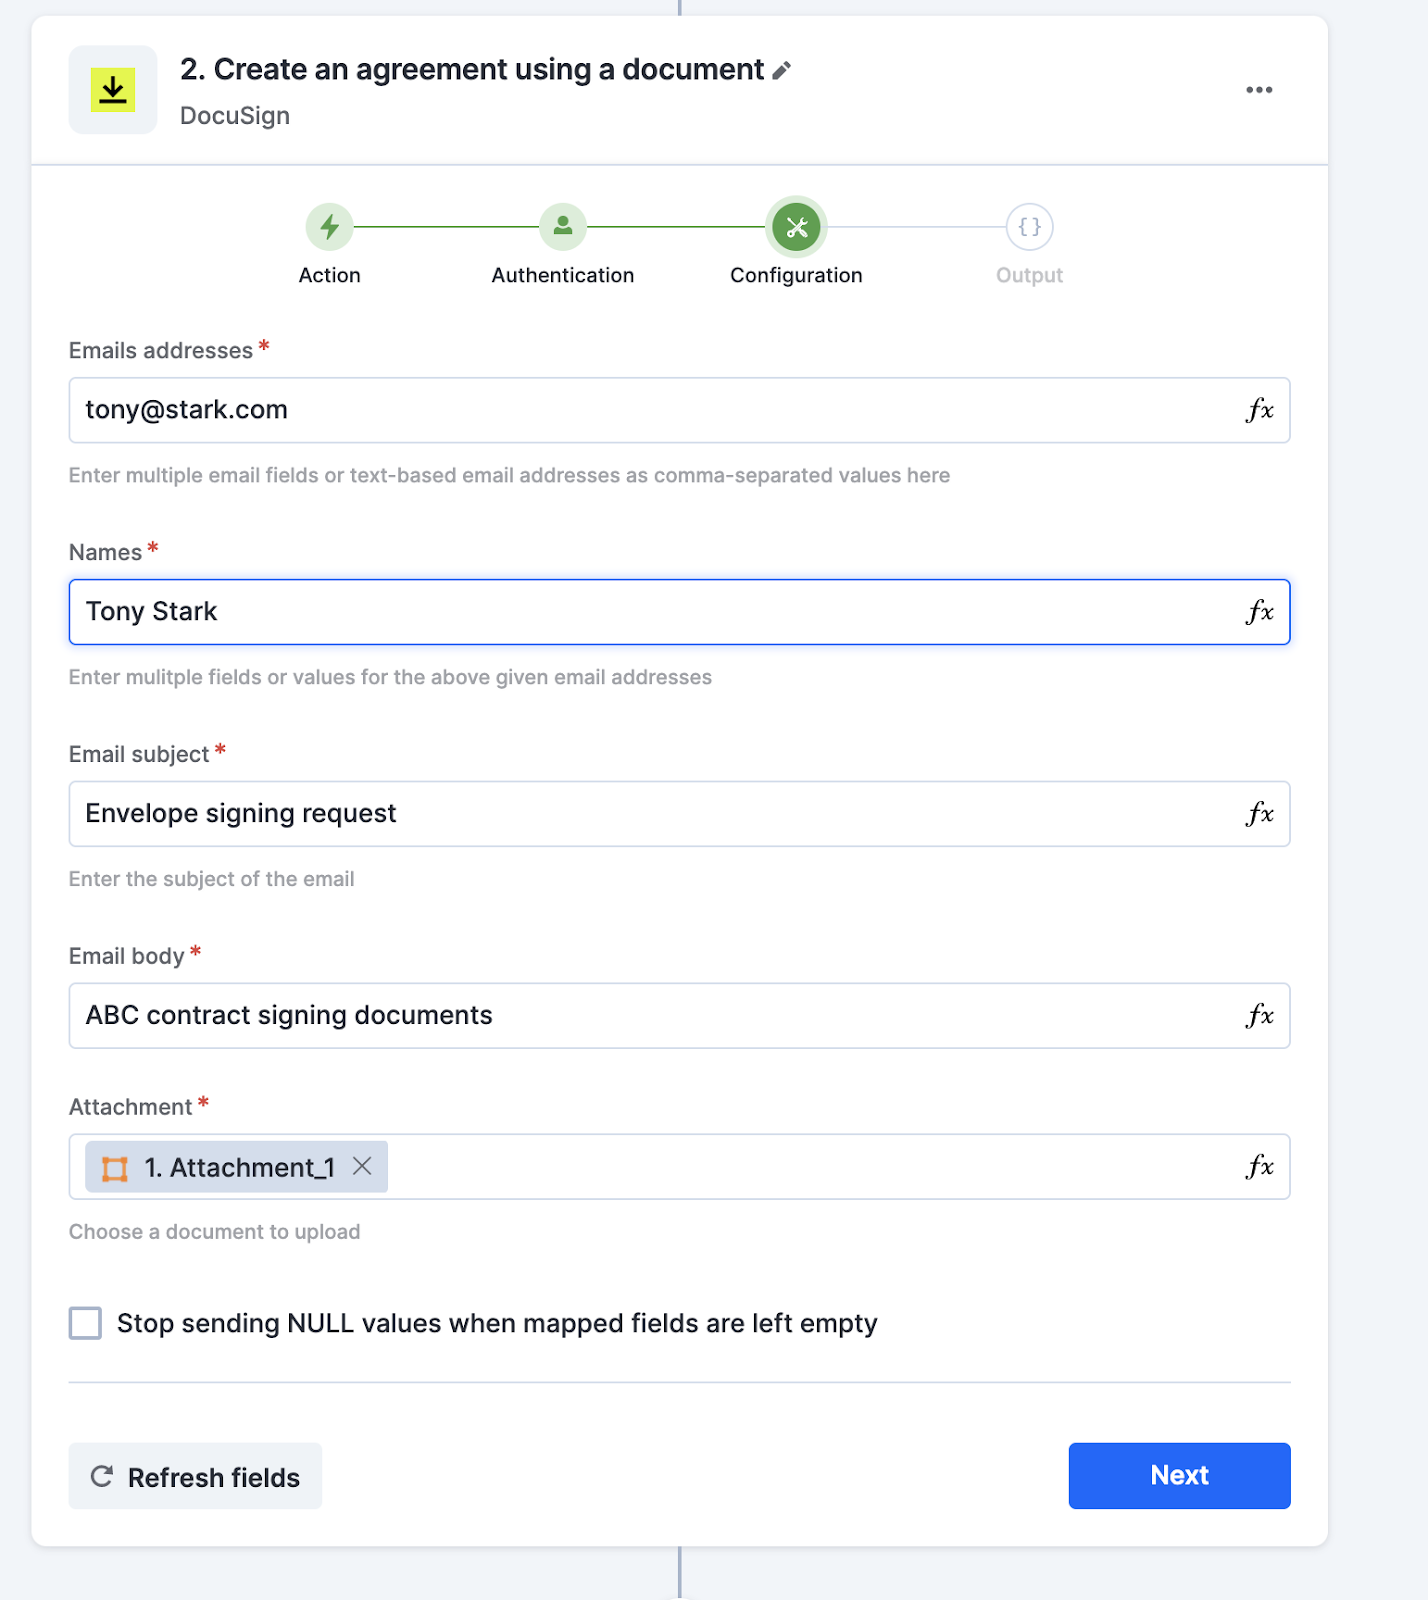
- Click Next.
- After a successful configuration, test whether your DocuSign action step is set up correctly by clicking the Test button. The connector will pull field data from your selected DocuSign account and display it as a JSON output. Similar to the trigger step, errors are notified to you right away. Fix them before retesting the action step.
DocuSign connector as a trigger step
- Inside your Kissflow account, click your profile picture on the top right corner of the screen and click Integrations from the dropdown. Next, click the New integration button to provide a name and description for your integration.
- Once inside your editor, set up a trigger and action steps as necessary. Search for the DocuSign connector and select the desired trigger event When an envelope signing is completed.
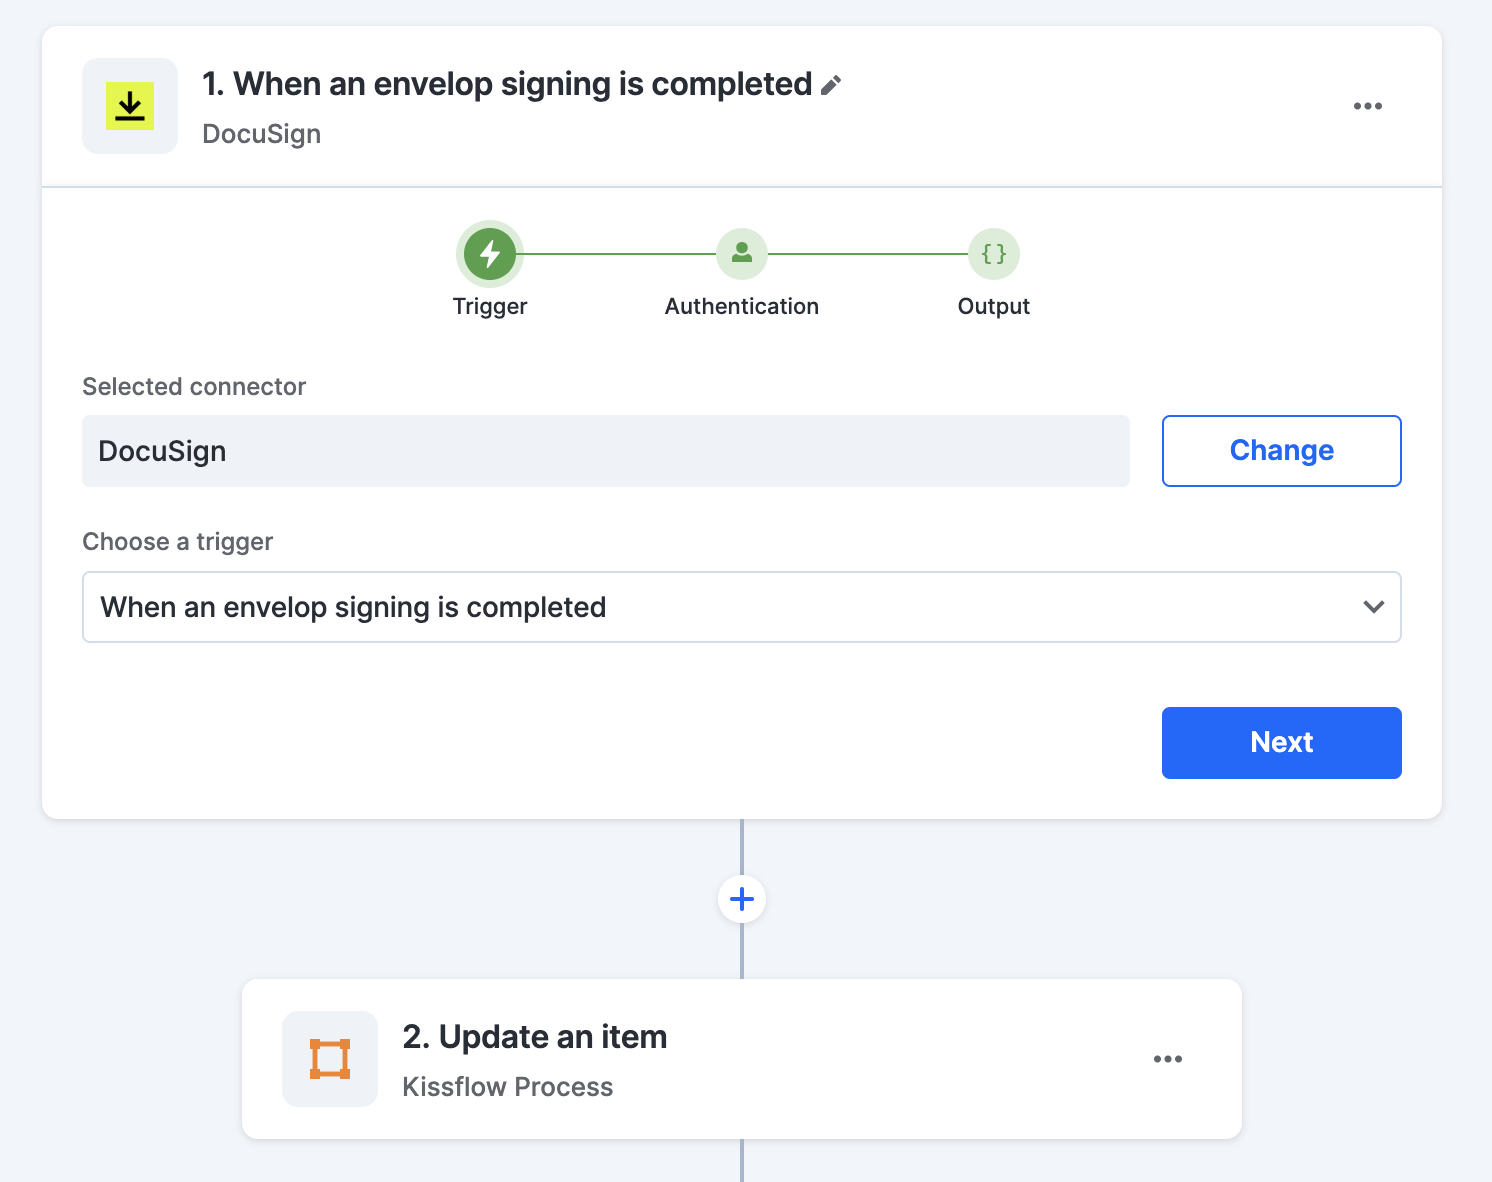
- After choosing your trigger event, authenticate the connector. Click +Add an account and Sign in using your DocuSign account. Choose, Update an item in the Kissflow process connector as the action event.
- After authenticating with your DocuSign and Kissflow account, add relevant values against the Kissflow process form fields. You can hit Refresh fields to view all the updated fields.
- Click Next.
- After a successful configuration, test whether your DocuSign trigger step is set up correctly by clicking the Test button. The connector will pull field data from your selected Kissflow process and display it as a JSON output.
Using the DocuSign connector to send and receive documents parallelly
Using the DocuSign connector's actions and trigger, you can easily send and receive signed documents back from DocuSign. For instance, if you need to sign employee agreements digitally, you can automate the entire process by creating two separate integrations.
Create two separate integrations with DocuSign as an action step in one integration and a trigger step in the other. Let us assume the above example, where we must digitally sign employee documents. For the first integration, the trigger can be a Kissflow process trigger When an item advances to the next step, the action can either be one of the two DocuSign actions supported in Kissflow. For the second integration, the trigger must be of the DocuSign connector When an envelope signing is completed, the action can be Update an item from the Kissflow process connector.
Once all relevant values have been filled in both integrations, switch ON the toggle button. The first integration gets triggered when an item advances to the next step in the employee onboarding process. An agreement is created as a PDF document or a template and sent to DocuSign for eSignature. Once the signing has been completed in DocuSign, the second integration is triggered automatically, and the Kissflow process action updates the same item in the employee onboarding process. By having two integrations run concurrently, you can automate the entire process without manually uploading documents to either Kissflow or DocuSign.