
 User guide
Using board layouts

Layout
The layout of a board makes it very easy to locate and navigate between items.
There are three different tabs that allow you to switch between the most commonly used list of items quickly.
- All - this is the default tab. All the items in the board are displayed.
- Assigned to me - all the items that are assigned to you for action are displayed.
- Created by me - all the items that you have created are displayed.
How your data is displayed across these tabs is dependent on the type of layout you choose. There are four:
- List
- Kanban
- Matrix
- Timeline
List
The list layout lists all your items. Data is represented in a tabular format, and items are stacked one after the other. Rows represent items, and columns represent all the fields from a board form. When you click a row, the form opens up.
This layout is ideal if you are in the habit of using spreadsheets to manage your tasks. You can review a lot more information in one go. Lists also offer the flexibility to configure the number of columns. Click the Show fields button (![]() ) to select the fields you want to display as columns. These columns can be dragged and dropped across the list to arrange them in the manner you want.
) to select the fields you want to display as columns. These columns can be dragged and dropped across the list to arrange them in the manner you want.
List layout additionally offers the flexibility to perform bulk actions. You can select multiple items in a list to delete them or update system field values.
Actions in list layout
- Search for items using keywords.
- Sort items based on a field value, either in ascending or descending order.
- Export items from your board as a .CSV file.
- Perform bulk updates to items.
- Configure the fields that are displayed as columns in the table.

Kanban
The kanban layout provides a more flexible and visual system that allows you to place items across a board. The layout is divided into columns that represent all the statuses in your workflow. Each item is represented by a card, and these are placed across the columns according to their status. You can drag and drop these cards across columns to change status. To make any other changes, click a card to open the form.

Kanbans visualize the progress of an item better as cards move through the different columns or statuses to completion. They are also better at providing a bigger picture, especially if you want to review any bottlenecks, for example, if items are piling up in a particular status.
Note:
You can move a card to the Reopened status only from the Closed or Resolved statuses.
Unlike the list layout, columns cannot be configured in a board, as they represent statuses. However, you can choose the fields displayed on a card. Click the Show fields button (![]() ) to select the fields you want to display. The fields ID, Title, Assignee, Start date, Due date, and Priority are default fields and cannot be removed.
) to select the fields you want to display. The fields ID, Title, Assignee, Start date, Due date, and Priority are default fields and cannot be removed.
Note:
The Priority field will be hidden if you have turned off priority in settings.
Actions in kanban layout
- Search items using keywords.
- Sort items based on a field value, either in ascending or descending order. Additionally, the Kanban layout introduces an option to sort the items manually.
- Drag and drop cards to change status.
- Configure the fields that are displayed on a card.
- Collapse columns that you are not actively using.
Matrix
Matrix is like Kanban with an additional option of having a secondary categorization through rows. In a matrix layout, you can plot your items on a dynamic grid and choose fields for both horizontal and vertical pivots. This layout is best suited for performing slice and dice of the board data and for performing resource balancing and reallocation. Similar to Kanban and List, you can choose to group your columns or rows based on assignees, steps, or custom user fields. All uncategorized items will be pooled together under a column or row called Uncategorized.

Timeline
The timeline layout is ideal if you’re looking for a visual representation of your board items against time. It provides a panoramic view of your board items, allowing you to visualize your work items and see what’s coming up next. This helps you plan your items and subitems way ahead and meet your deadlines comfortably.
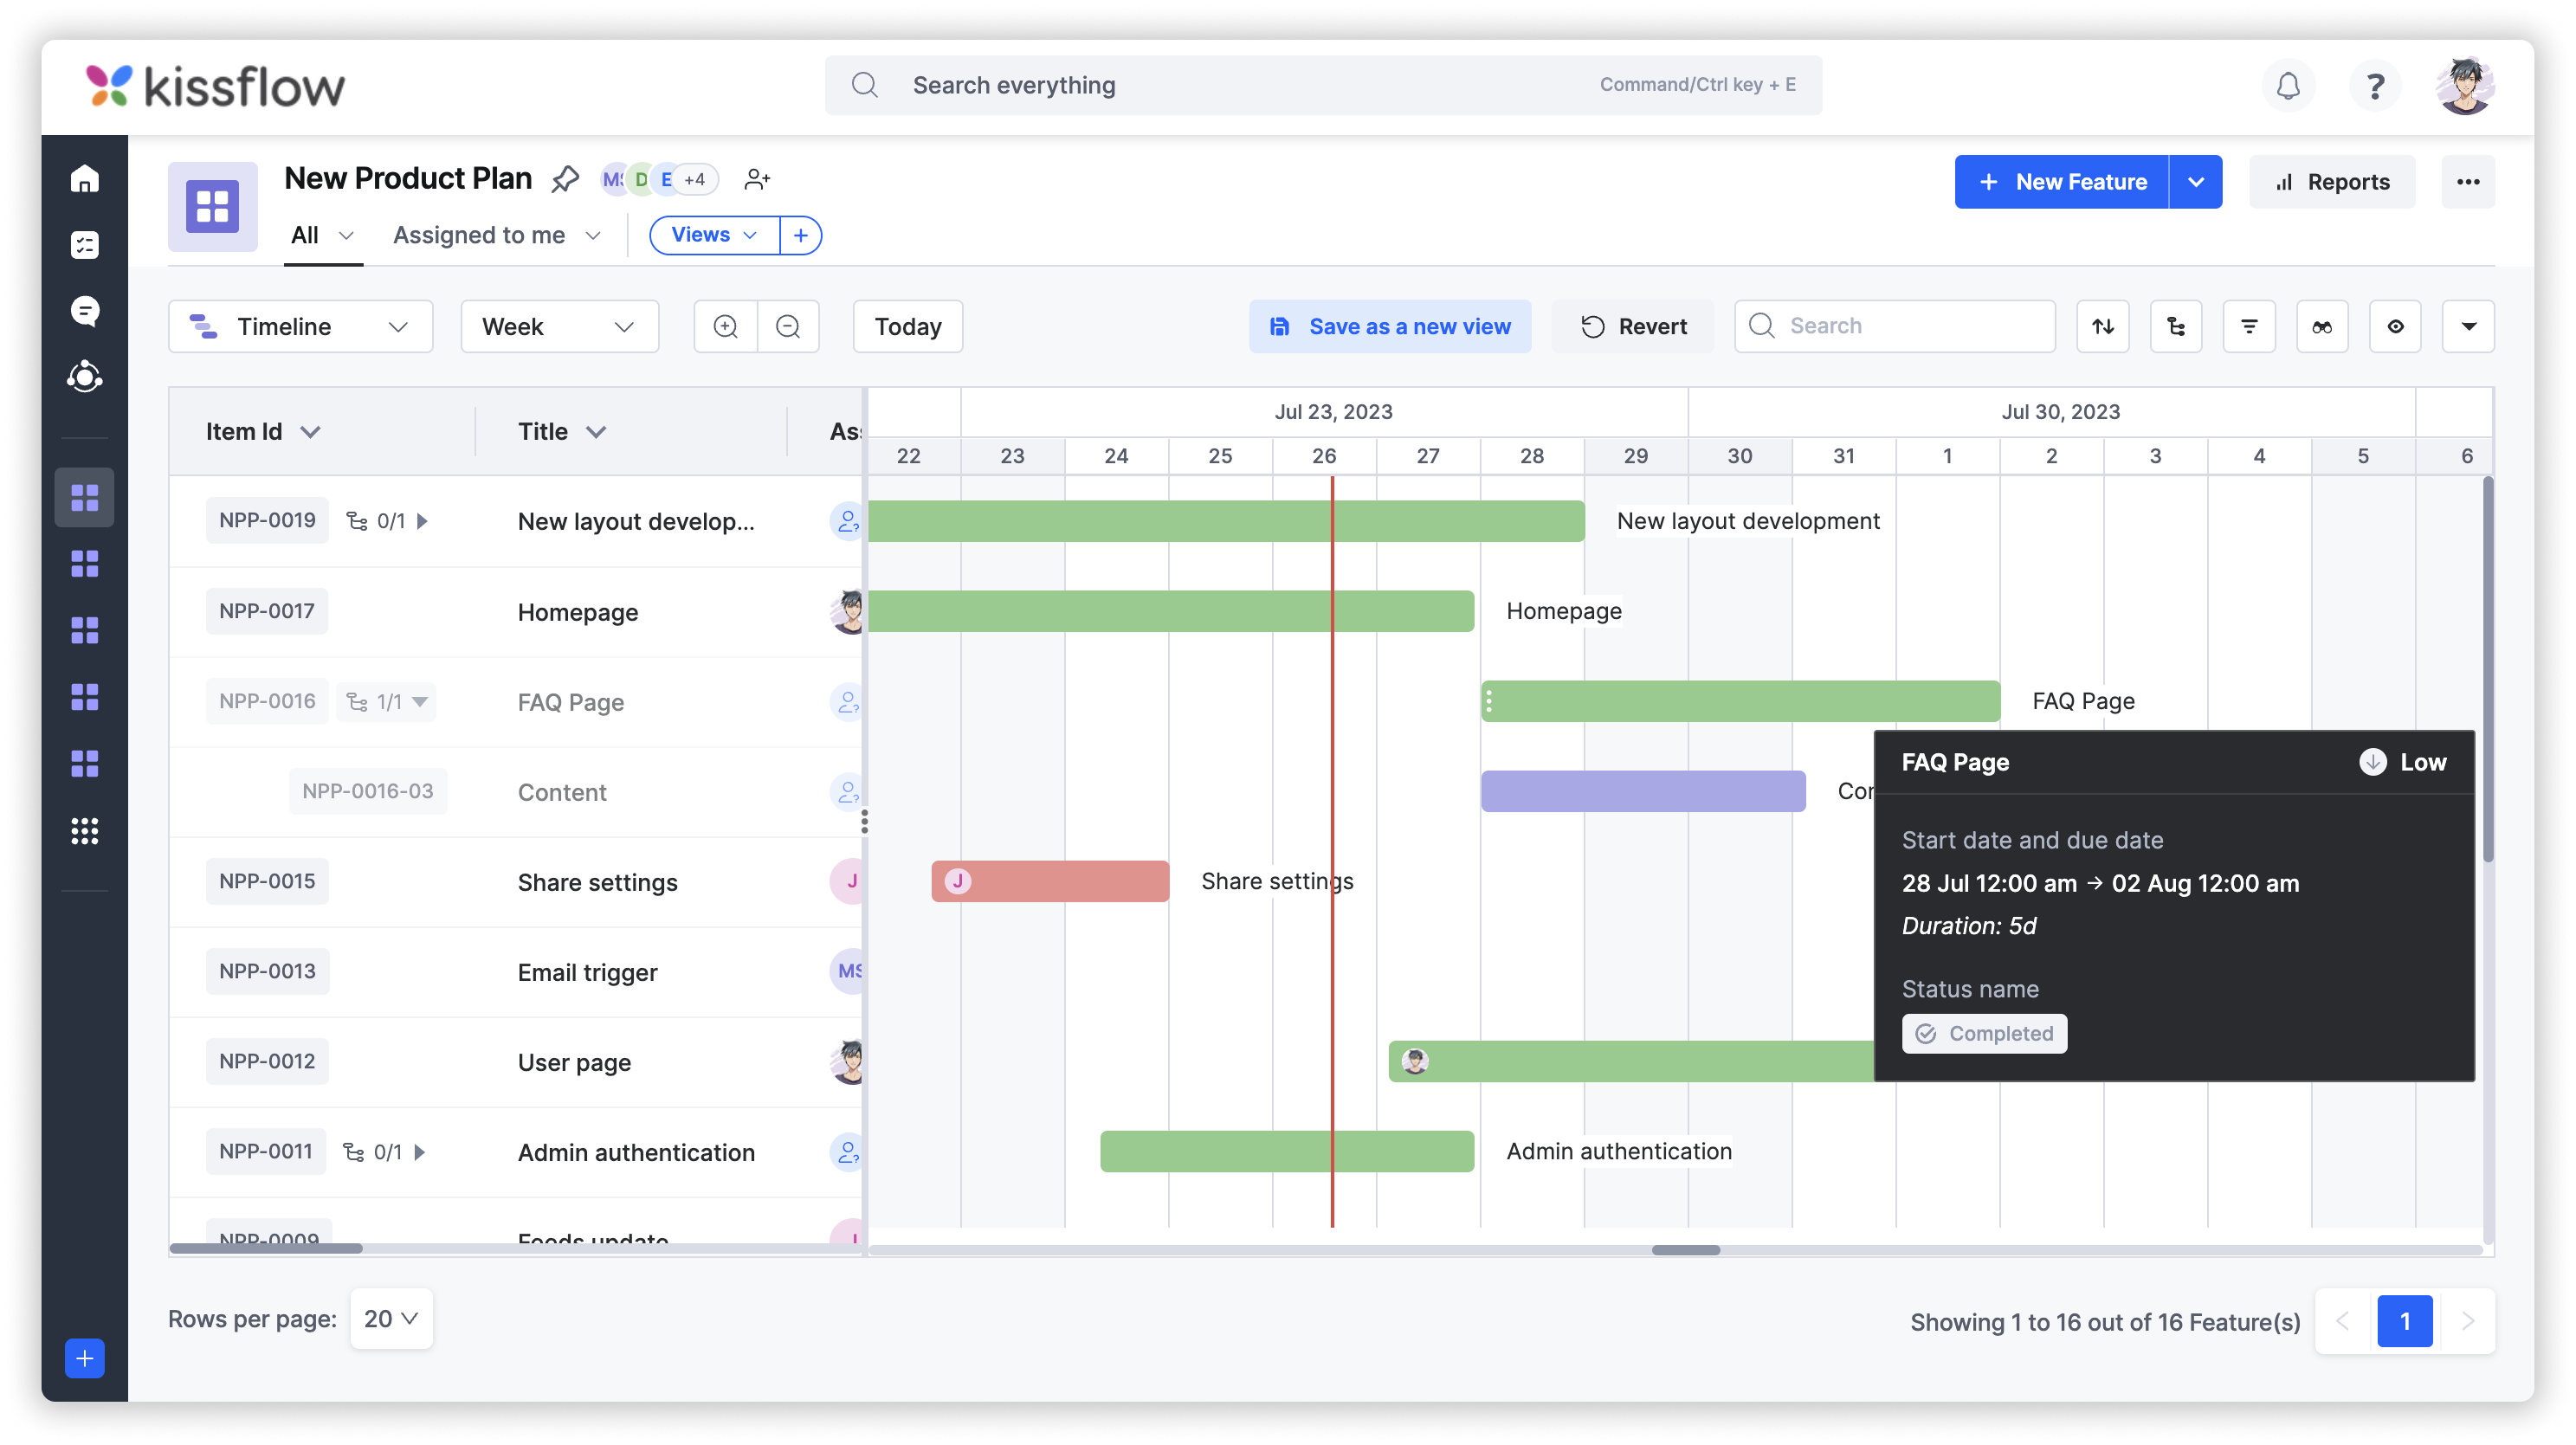
The left panel displays the ID, title, assignee, start date, due date, priority, and status of the items and subitems by default. You can hide them if you want, by clicking the Show fields button (![]() ). On the right side, the layout is divided into vertical columns representing the days.
). On the right side, the layout is divided into vertical columns representing the days.
In this layout, the items are depicted as horizontal bars where,
- Green bars represent items
- Red bars represent overdue items
- Violet bars represent subitems
These item bars are positioned between the start and due dates you’ve already set in the item cards. You can modify these dates in the item card, or by directly dragging the item bars to the desired range of time. You can also grab and adjust the ends of the bars to modify the start and due dates.
By hovering over an item/subitem, you can see its name, status, priority, start date, due date, and duration.
Note:
Weekends are also considered in the duration of an item or a subitem.
Actions in timeline layout
You can set your timeline layout in intervals of hours, days, weeks, months, quarters, and years from the drop-down near the layout selector.
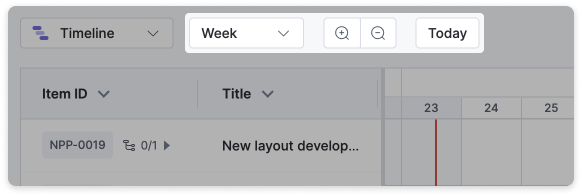
Day - Most granular interval, and it is best suited for tracking daily progress.
Week - Optimal for planning the week ahead.
Month - Ideal for looking ahead to the month and identifying long-term goals.
Quarter - For boards that track strategic initiatives or long-term goals.
Year - For tracking items that change on a yearly basis.
Click the Zoom in button ( ) or the Zoom out button (
  ) if you want to scale up or scale down the layout. If you want to snap to the current date, click Today. Additionally, you can,
- Search for items and subitems using keywords.
- Sort items either in ascending or descending order.
- Export items from your board as a .CSV file.
- Save as a new view.
Read a use case for timeline layout.
Switching between layouts
All these layouts have their own highlights. While the list layout helps you review and make bulk changes quickly, the Kanban layout provides a more holistic view. You can switch between these layouts with ease on the board. When you switch from one layout to another, you will not lose any data.
However, there are a few pointers to note when you switch layouts:
- Sorting does not synchronize across both layouts. If you have sorted items in the list layout, the sort order won’t apply to cards in the Kanban layout.
- Fields you have configured in one layout do not synchronize with the other. Columns that appear in the list layout and the fields displayed on cards are configured independently.
- Filters synchronize across all the layouts. If you have applied a filter in one layout, the same information gets filtered in the other. However, filtered data is displayed based on the sorting that’s currently applied in a layout.