Creating project views
Modified 1 year ago
Abhiram
Who can create views
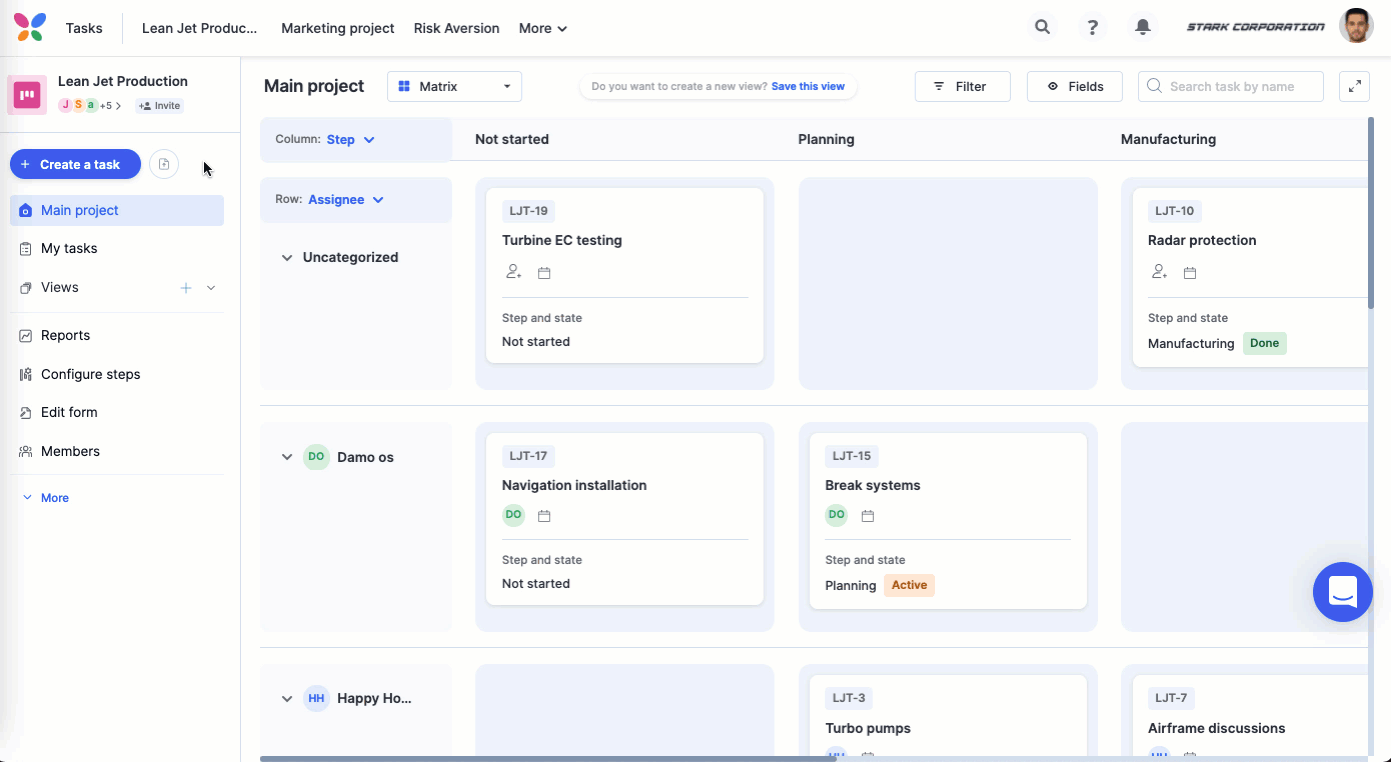
You can create views based on a subset of all the project data to have better context while working. This is ideal for teams inside teams. Project views can be created and saved in Kanban, List, or Matrix style of visualization.
Only Project admins can create new views based on the main project. Once created, these views can be accessed by anyone in the project.
Creating and saving views for my project
To create a new view, click Create a view button ( ) found at the left navigation of your project.
- In the popup box, provide a name for your view. The source project will always be the Main project. Click continue.
- On the right side of the page, update the view configuration where you can change the default visualization for the view.
- Based on the visualization you’ve chosen, you can arrange the tasks into columns and groups.
- For Kanban, group your tasks based on assignee, step, or custom user fields.
- For List, group your tasks by the default list, assignees, steps, or custom fields.
- For Matrix, arrange your tasks in columns and rows based on assignees, steps, and custom user fields.
- You can also add normal and advanced filter conditions to track specific tasks on your unique views. Click Done to save the view.
When a view is created, it’s automatically added under the Views menu on your project's left navigation bar. Click a specific view tab to access that view later.
Customizing views
As someone who created a view, you’ll have permission to delete a view or alter its existing view configuration by changing the visualization and filter conditions.
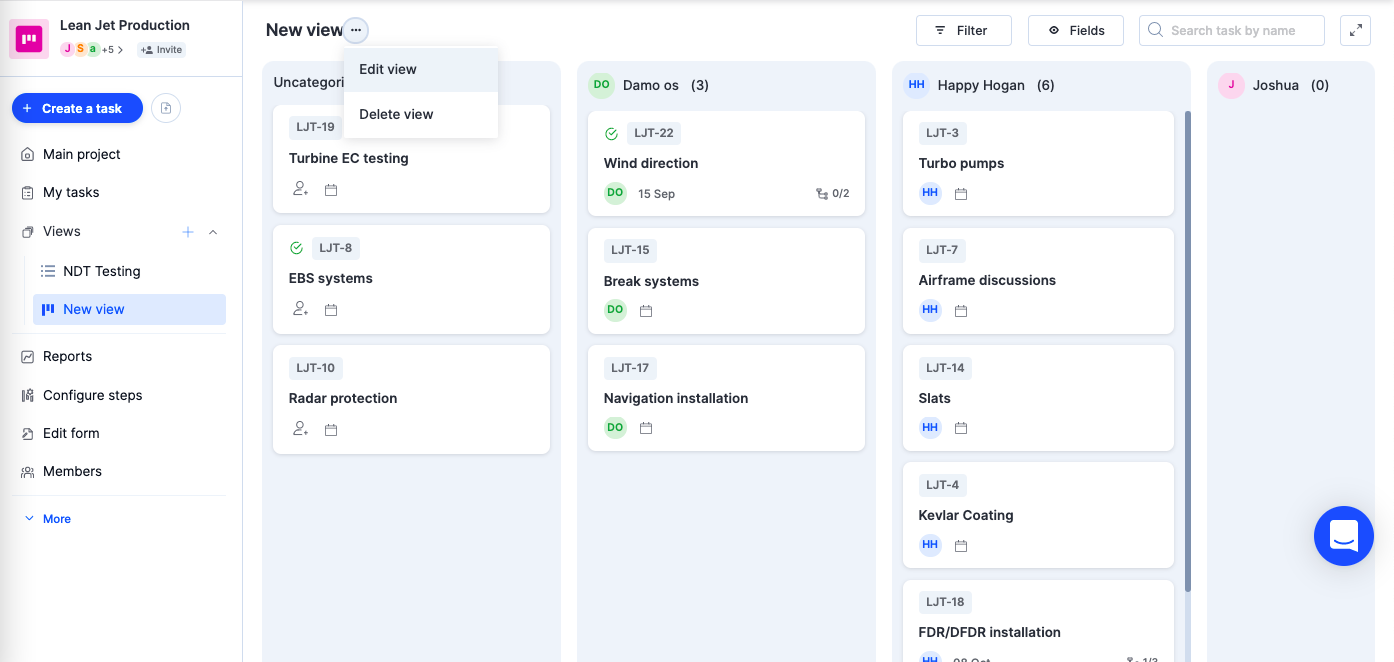
Editing views
Select the view by clicking the view name on the left navigation of your project page. Click the More options button ( ) beside the view name > in the dropdown, click Edit view. You’ll now be able to see the View configuration slider on the right side of the view. Make necessary changes to the view and click Done.
Deleting views
To delete a view, select the view by clicking the view name on the left navigation of your project page. Click the More options button ( ) beside the view name > click Delete view. The view will be permanently removed and cannot be accessed later.